
 We all have bedrooms. We all sleep on a bed at night in our bedroom. (Or at least most of us!)
When I was first married, I had no sense of design for my home. I can’t believe that I didn’t care what anything looked like or if anything matched. About a year later I realized that I can make my home cheap and cute on a budget. That’s when it all started and I haven’t stopped!
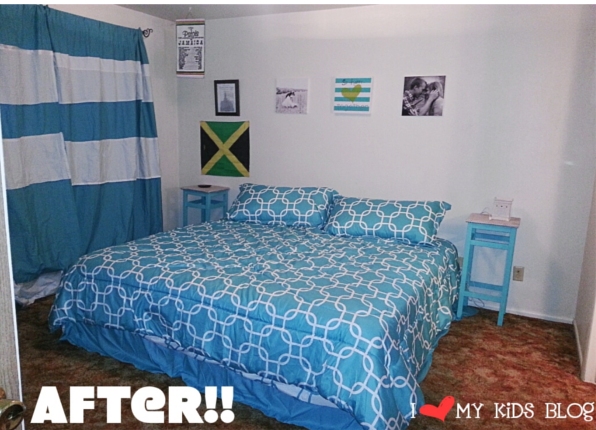
Today I am going to show you a few steps you can do to make your bedroom go from dull and boring to bright and beautiful!
STEP 1: COLOR IS KEY!!
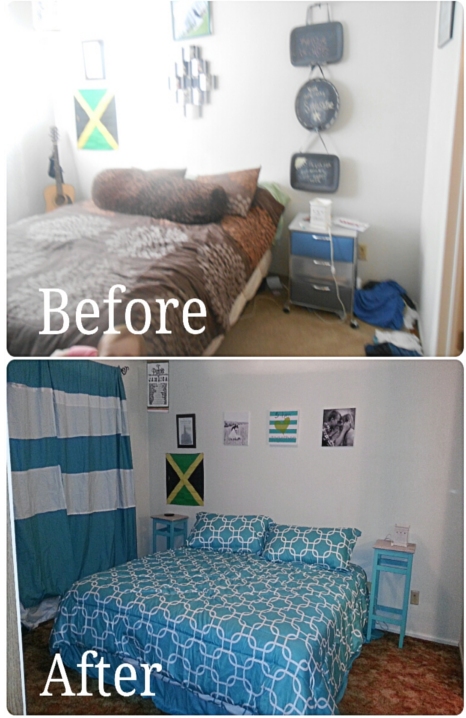
Okay, my room before was seriously a death trap. Go up and look at the before again.
First off, look at that lovely carpet….yeah it doesn’t get much worse than that. Totally 70’s right there.
Don’t ask me why I even thought it was an okay idea to go brown. It was the worst decision.
Color is the key. Think about it this way, you wake up every morning to the same thing. You need to make it something you can enjoy.
If you love pink, choose pink.
If you love coral, choose coral.
If you love grey, choose grey. But make sure you have a bright or light color to it.
My color scheme is turquoise, grey, white, and yellow. I haven’t added much yellow, but my throw pillows will be that once I find a good deal on pillows.
I got my comforter set at Big Lots for $29.99. I couldn’t pass it up. It was an 8 piece set.
Make sure you shop cheap in the bedding department it you are on a budget!
STEP 2: Find cheap furniture or free furniture and re-do it!
If anyone has told you re-doing furniture is hard, they are LYING!!
It’s so easy. Let me show you an example of my night stands that I used in my new room re-do.
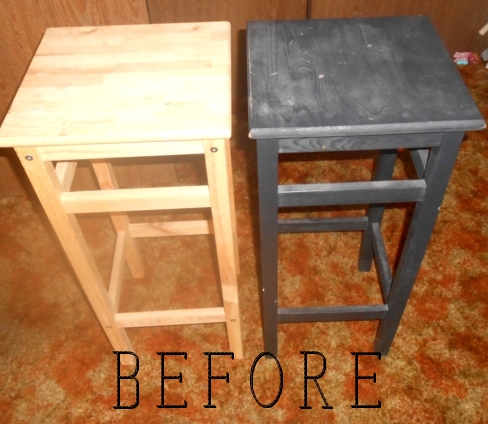
You see those puppies? Those are kitchen stools, in mint condition.
Want to know where I got them?
THE TRASH!
Yup, the trash. I was at my sisters apartment one night and I saw these beauties right by the huge apartment trash can. (Not even in the dumpster!) 😉
I think the person before attempted to redo them, then just gave up. I’m grateful they did, because I scored 2 FREE night stands!
I have wanted matching night stand for ever but I have never wanted to spend the money on them, plus I wanted them to be cute. I didn’t want to buy brand new furniture just to re-do it!
I was so giddy that I had found these! I begged my hubby to get them and I promised beautiful night stands in return.
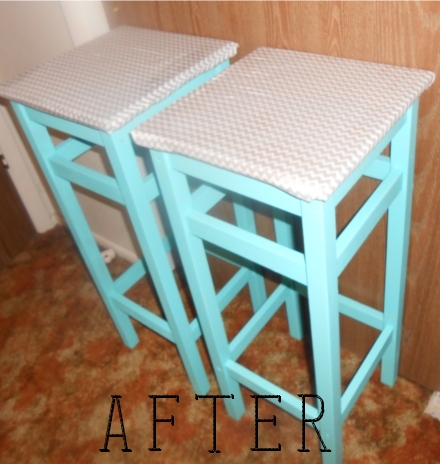
This is what the looked like after-
Here is the BEST part, how I did it:
I went to Lowe’s and picked up a color swatch the same color as my bedding. I asked the friendly man behind to counter to please make me a sample of the swatch color. He did and it only cost me $3!
After that I went to JoAnn’s fabric and chose my fabric- grey chevron.
I painted the stools (only one coat and I didn’t even sand the stools!
Then I glued, yes glued the chevron fabric onto the stool.
I told you it was easy!
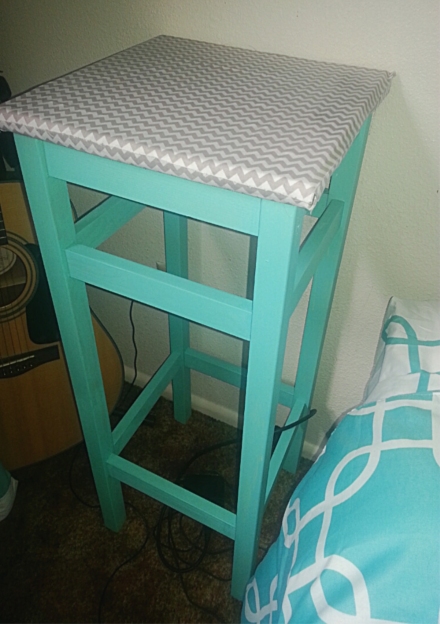 It adds just the right kind of feel for our room!
STEP 3: Lots of decor!
Decoration is also a huge key. You can do easy decor like photos.
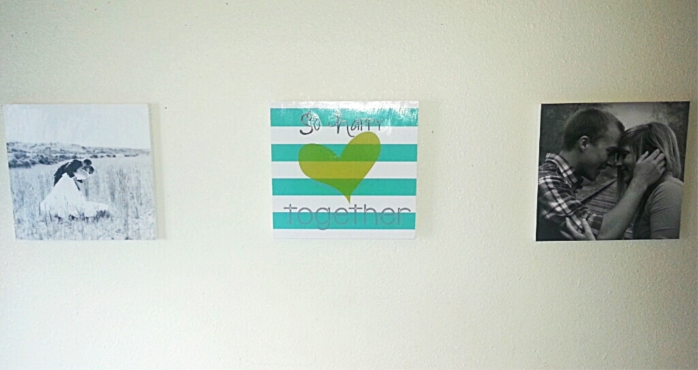 These are the pictures above our bed, I made the center picture. I printed all the pictures off at Costco on a 12×12.
I went to JoAnn’s again and got 3 12×12 blank canvas. The price for the canvas was $17.99 but I used the 40% off coupon and only paid $11 for the 3 of them!
I used modge podge to glue the pictues onto the canvas. Then I did modge podge over the pictures. This give it a more glossy look. (If you do this it will come on white, but dry clear.)
I’m also going add the word “Soulmates” or “Forever” below the pictures, but I have to get my letters!
Also, feel free to use sheets for curtains. My curtains are two twin sheets from Walmart for $5 each.
I got one white twin sheet, and cut it into pieces. I then GLUED, yes, hot glued the white sheet onto the turquoise sheet!
It seriously cost me $15 for these cute cheap curtains.
I love them, even if they are a tid bit un-even!
That’s what I have for you. Lets look at the before and after one more time!
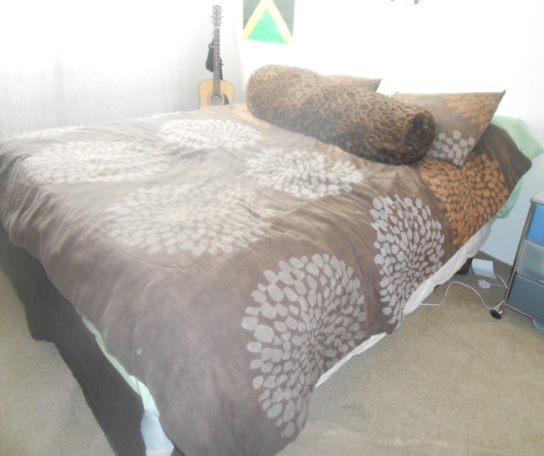 YIKESS!! (ABOVE)
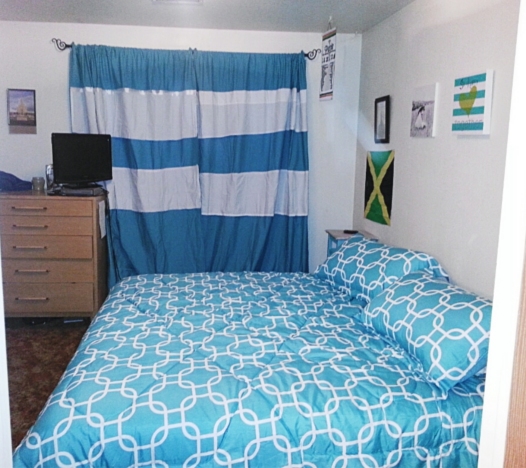 BEAUTIFUL!! 🙂
Hope this helps! Make sure you check out how to make some little man bow ties here for your little guy!!
Feel free to share a picture of your newly re-done bedroom, I’d love to see it!

- 5-Winter Themed Bone Chilling Survival Movies on Netflix - 12/29/2017
- 7 Best Scary Movies for Kids that are Streaming on NETFLIX - 10/13/2017
- Watch P. King Duckling on Disney Junior + Giveaway - 06/26/2017

Leave a Reply