
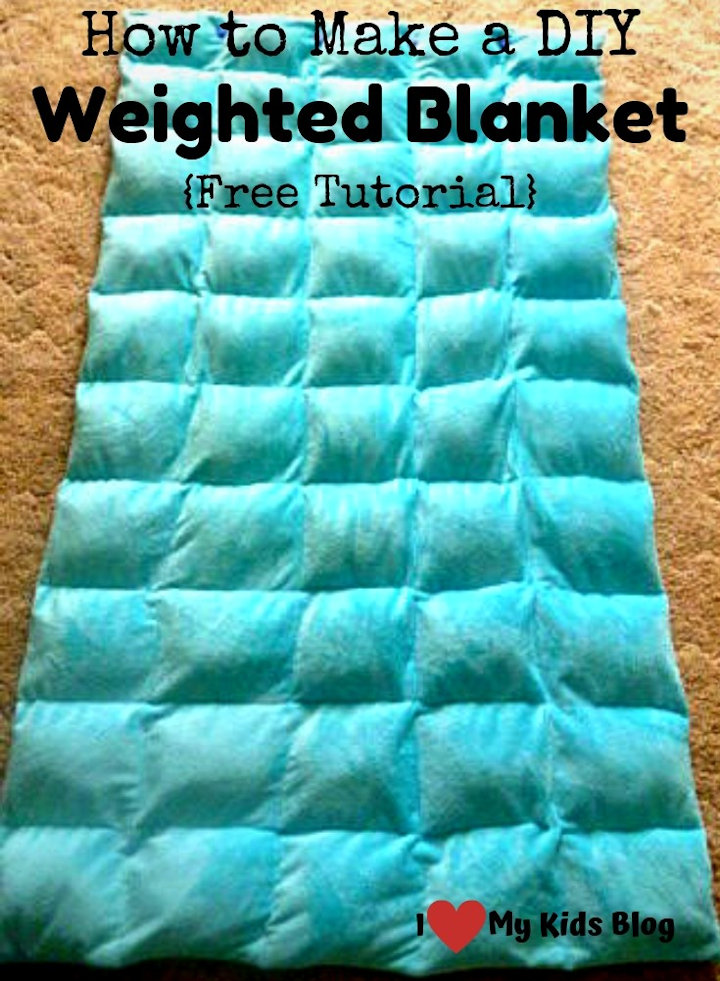
Welcome to the FREE Tutorial on how to make a DIY weighted blanket!
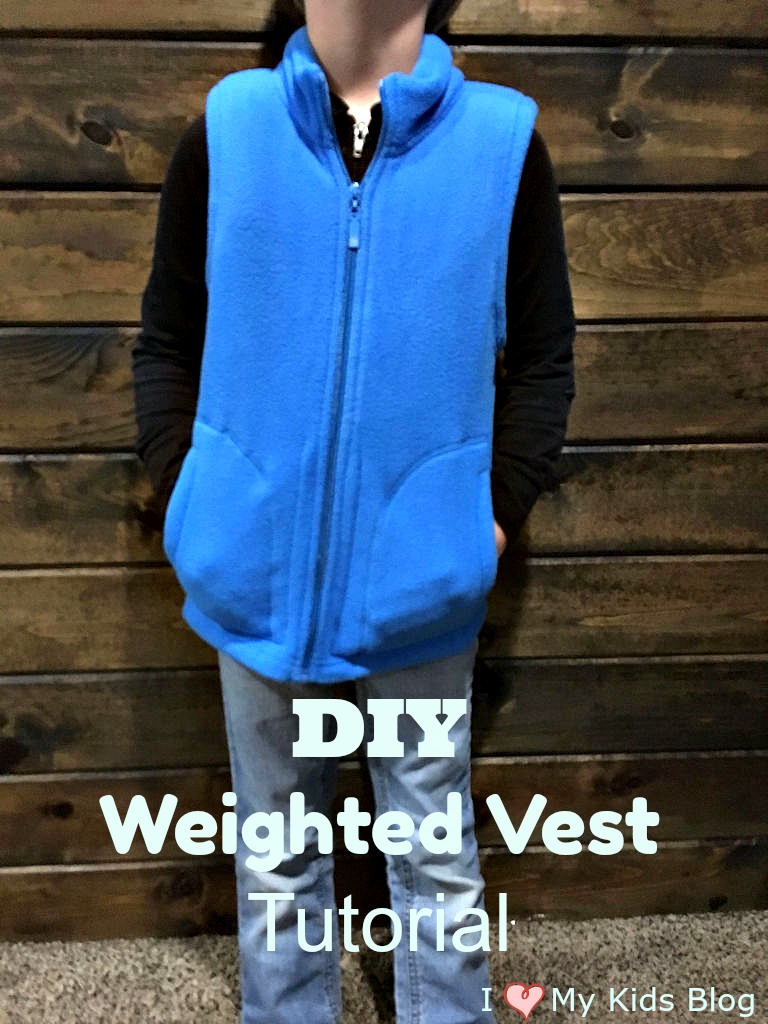
Related: check out the new post – How to make a DIY Weighted Vest
My friend has a little boy that has Autism, she thought he would benefit from a weighted blanket and asked me if I could make one. I had never heard of it, so I started doing a little research. Apparently, weighted blankets can help calm and relax people when they are scared, angry, frustrated or flustered. I decided to figure out how to make one and thought a tutorial would be handy for others who are thinking about making one too! Enjoy!
**Please note, this is just a tutorial on how to make a weighted blanket, I am not a doctor or a scientist, I am a mom that sews and have seen these blankets work for children with autism. Feel free to search it out for yourself and make a choice on if it would be a good fit for your loved one! **

Weighted Blanket to help calm and relax!
2017 Update! We have a brand new weighted blanket post with the step by step VIDEO Tutorial

Click on the image to go to weighted blanket step by step VIDEO tutorial
If you don’t have time or the resources to make one of these, I recently found an amazing price on an already made weighted blanket that ships free with Prime! Check out this already made weighted blanket here*! Although, I highly recommend making your own if you can because you can personalize it to fit your specific needs!
Before I start, I just want you to learn from my mistakes….So mistake #1 was doing this while my “helpful children” were around. I wish I would have done this project after bedtime or during school. I had to stop every few minutes to get a drink or milk for one child, stop them from using my sewing scissors ON the blanket I was trying to sew, etc….learn from my mistakes! I’d also recommend reading through the whole tutorial once before starting….too many times I start to follow a tutorial and jump ahead and have to unpick my project…again, learn from my mistakes!
What you will need:
- Fabric (I used 2 yards to make this size blanket-turned out to be 36 x 60-you get however much fabric you want/need)
- A disappearing ink pen
- Ruler OR straight edge of some sort
- A scale that can measure ounces
- Poly Pellets (don’t worry I will tell you where to get them in the next paragraph)
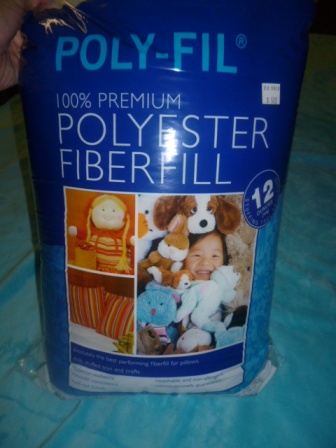
- Poly Fil (stuffing)
- Then of course a sewing machine, thread, scissors! 😉
Make A Plan
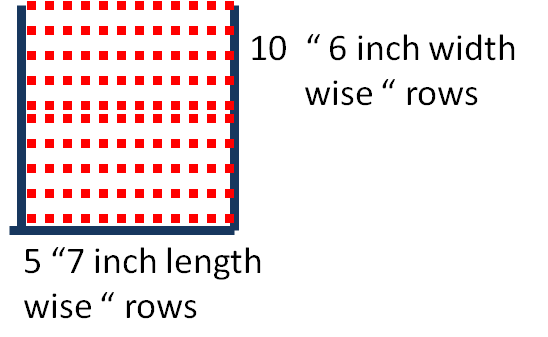
The first thing you need to do is MAKE A PLAN-You need to know how many squares are going to be on your blanket. This depends on how much fabric you use. My blanket measures 36 x 60. I decided that I could make each “column” (length wise) just a little over 7 inches each that gave me 5 squares a long the top.
**Mistake #2–make sure your “columns” are at least 6 or 7 inches as you have to stuff your arm all the way down to the bottom row to push the stuffing in….you don’t want your arm to get stuck in there!** Since the long side was 60 inches, I decided that having 10-“6 inch” squares would be perfect. So I made a 5 x 10 blanket, which meant I had 50 squares. Are you with me so far? If not let’s try saying it another way. Divide your blanket into equal squares….was that easier?
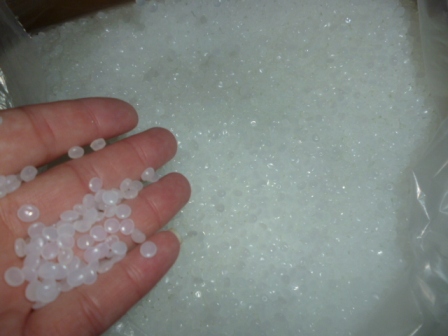
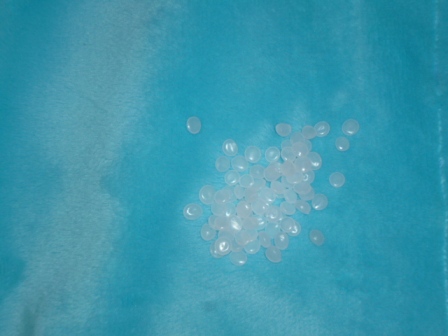
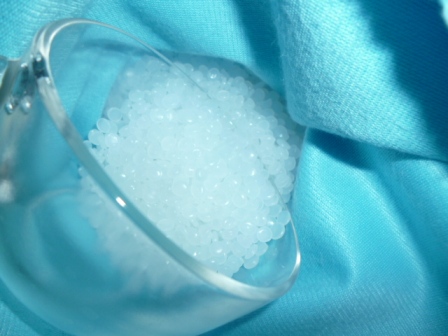
You also need to know how many lbs of poly pellets you will need based on the weight of the person you are giving the blanket to. After researching I read that you should take the weight of the person/child and use 10% of their weight. The child I made this for was about 90 lbs, so I needed 9 lbs of poly pellets. Polly Pellets are small, round, clear, bead-like balls that are generally used in stuffed animals. They are machine washable and safe for the insides of a blanket. You can purchase poly pellets at any craft store, but they are pretty pricey, you get a small 1 lb bag for $4.99. I found a screaming deal on eBay, I got 25 lbs for $30 and split the box with my Mom who used them to make a weighted blanket for her granddaughter/my niece.
Here is a close up of what they look like: (Update Dec 2016: I have had many people ask about the poly pellets. Prices definitely have gone up since I wrote this post a few years ago, Ebay still seems to be the best price. I recently made another blanket for a friend using this tutorial and the best price I have found is $1.94 a lb HERE is a listing for them. What I like about these specifically, is tells you it can handle up to 250 degrees, so you KNOW these will be machine washable and able to dry in your dryer! Here is another pellet option HERE There are more options besides just clear pellets as well, I’ve used white ones and black ones before too. If you need it fast and have Amazon prime, this was the best deal I found with the free 2 day shipping!)
Now figure out how many ounces of poly pellets you need in each square. I had 9 lbs which equaled 144 oz. I divided that by 50 squares and I needed to put 2.88 ounces in each square. My scale wasn’t that specific, so I settled for 2.8 ounces in each one and made one row with 3 ounces in each square….it evened out!
Time to Sew!
You need to sew your fabric right sides together. Sew the 2 long sides and one short side. Leave one “short side”–which we will now refer to as the “top”–open so you can flip it right side out. I didn’t take pictures of this (sorry) so I made this handy little picture 😉 That’s right all you visual readers….I’ve got your back!

sorry, my box drawing skills need work!
Flip your blanket right side out and if you are awesome….iron it so your edges are flat and perfect like your Home EC teacher would ask for….I am not awesome, I skipped this step. (Just being honest)
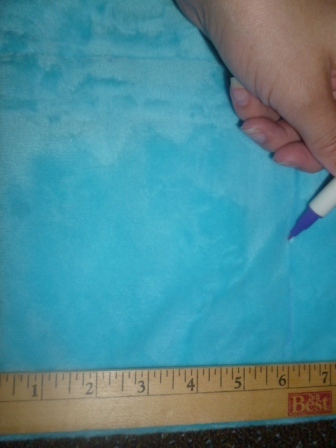
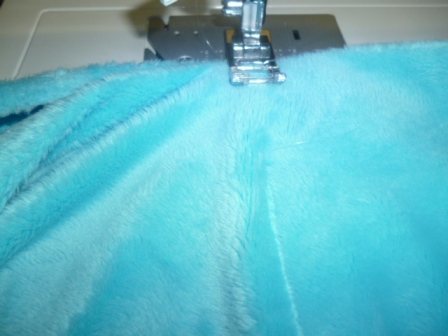
NEXT measure along the bottom and the top and make a mark every _ X_ inches. In my case I measured out every 7 inches and used my disappearing ink pen to draw a long line all the way up and down my blanket. Then starting at the bottom of your blanket sew your lines up to the “top” (remember when we name the open end the top–just reminding ya!) It is really hard to see the sewn lines, so look at the next picture below this one for a close up!
When you get near the top stop sewing 2 or so inches so later we can fold over the “rough edge” for a clean finished edge. Here is a closer picture of the lines and the “open space” you leave at the top.
Can you see how I didn’t sew all the way to the top? This will come in handy later!
Mark it!
Once your “long lines” are sewn it is now time to prep to fill your first row of squares. I took my disappearing ink pen and measure out how “tall” I wanted my squares. In my case (since it was 60 inches and I was doing 10 rows) I measured out 6 inches.
Using a disappearing ink pen, draw the whole way across your blanket so you have a line to sew on.
Time to weight the blanket:
Once your line is drawn, measure out the proper amount of poly pellets for each square.
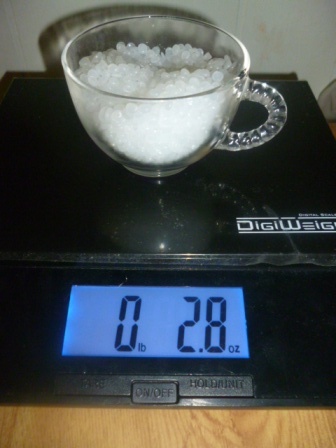
Once it is measured out dump them into each square. In my case I had 5 squares. Give the blanket a shake to get the pellets to settle to the bottom.
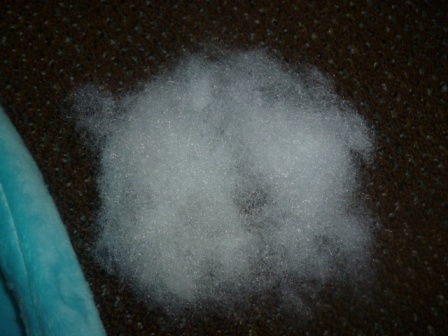
Once all 5 (or however many you have) are filled then it is time to stuff them with a handful of fiber fil. The fiber fil just makes the blanket plush and soft.
Now take this to your sewing machine and sew along the disappearing ink line you made….watch out that disappearing ink will disappear on you. 🙂
Sew along the first set of “squares”
Here is the first finished row and you can see the 2nd line that I “drew on” with my disappearing ink.
Then you repeat for the next row, and the next, and the next. etc. As you get farther and farther each row the blanket will start to get heavy, so make sure when you are sewing it, the heavy part has a table or something to sit on, so it won’t hurt your machine. **Mistake #3-this soft kind of fabric is hard to sew on, it is hard to sew straight, luckily since the blanket is stuffed, you can hardly tell, but in the future, I will only make them with cotton fabric**
Almost done with your weighted blanket
When you get to your final row you will want to stop the normal “routine”and do a couple of things to make a “finished” look to it. First you want to fold over your rough edge (this is easier if you do use an iron–to press down your nice edge, but again, I didn’t.)
Fold over your “rough edge” so you have a clean edge when you sew it together
Remember when I told you to leave about 2 inches from the edge, this is why, after you fold over your rough edge, you will want to “finish” sewing up your long columns (I had 5 columns-you may have more or less depending on your blanket size.)
If you don’t “finish” sewing your long lines your poly pellets will fall into another pocket, so this part is important!
Finally you stuff your final row of 5 pockets (or however many you have) with your poly pellets and your stuffing. CAREFULLY take to your machine and sew (with your folded over edges) to make a clean looking seam. YOU ARE DONE!!!!!!!
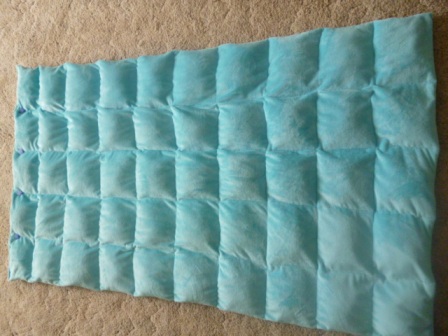
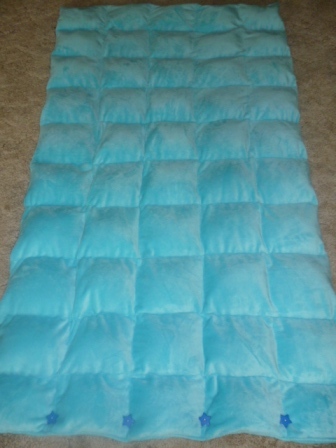
My final blanket was 36 x 60 and I used 2 yards of fabric to start. The little boy requested these stars be put on the blanket somewhere!
Final Thoughts!
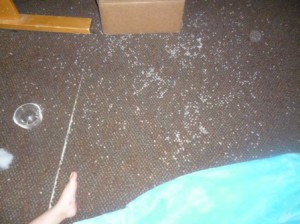
Mistake #4—DO NOT leave your poly pellets out when you go answer the door if your kids are awake. They are just WAY to tempting to play with and throw all over the floor. Go ahead ask me how I know!
Anyone have a flooring company that wants to be highlighted on my blog in exchange for new flooring for my poor sewing room? J/K 😉
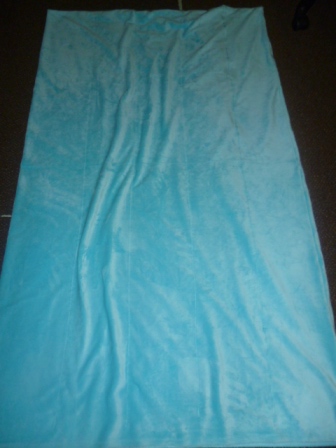
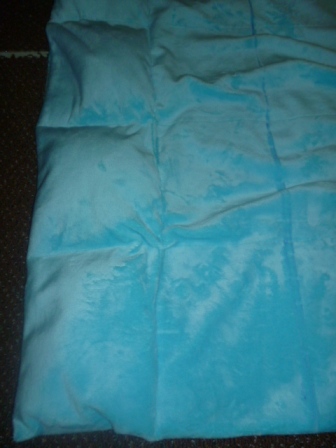
It took me about 2 hours to complete the blanket. It would have been less time if I had not stopped so many times to take care of little “emergencies” that my children created during that time. The best part about these blankets is they are VERY forgiving! You can see in this picture (this is after I sewed my original long lines) how my fabric is super wrinkles, not sewn straight, and bumpy:
This blanket is forgiving-even when it is bumpy!
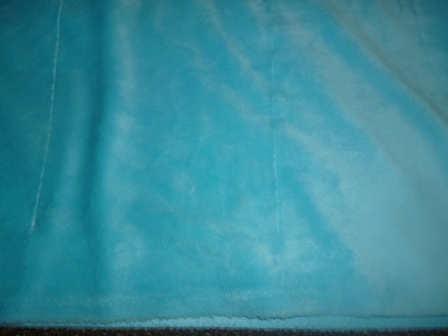
The blanket is stuffed, so you are hardly able to tell that I had trouble sewing straight lines on this fabric! See:
So even if you are a beginner, you can totally make this weighted blanket!
Update if you missed. We have a brand new weighted blanket post with step by step video tutorial.
Click here for Weighted blanket Video tutorial
Oh one more mistake of mine to learn from. Mistake #5 After you clean up every little poly pellet (they aren’t cheap, so I wasn’t going to vacuum them up). DON’T put them within reach of your 2 year old or she will pull them down and spill the entire BOX, AGAIN. Even when you are sitting right there sewing! I didn’t take a picture of that one….but I couldn’t even SEE the brown carpet-they were EVERYWHERE!
How to care for your weighted blanket:
So how do you wash this blanket? It should go through your washer just fine on the gentle cycle if you have it. It will be VERY heavy in the washer. As long as you use poly pellets that are heat resistant, then you won’t have trouble if you use your dryer’s lowest heat setting. If you are worried at all, you can head down to your local laundr-o-mat. Be sure to use one of their giant machines to wash and dry it! Another idea is to use waterproof shower curtains to sew the “blanket”. Then make a cute fabric duvet cover type thing to make it cute. When it needs to be washed, you pull it apart and wash the fabric and hand wash the waterproof “blanket”.
I tried really hard to make sure this tutorial was clear and understandable. That being said, I wrote it really late at night. If there is anything unclear or if you have questions PLEASE email me your question to (cjclaytons at gmail dot com). You can also leave a blog post comment, and I will answer your questions there BUT you will have to make sure you come back to look, since it won’t email you my reply. I’d love to hear about/see your blanket that you make! Please visit the I Love My Kids Facebook Fan Page for more awesome tutorials, funny posts about parenthood, and some AWESOME Giveaways!!!!
IF YOU LIKE THIS POST, PLEASE PIN IT by clicking on the image! and share it on Facebook.
Here’s the promised Video Tutorial. If this is not came out clear here, watch it on Youtube – clear and loud
If you need help with calculation – here’s the Free Weighted Blanket Calculator

- A VIVO Mask Will Complete Your Costume! - 10/18/2019
- 10 easy tips to make beautiful pies! - 07/09/2019
- 10 Boredom Busters for Summer Break! - 05/28/2019

This is a fantastic idea!! I would love to have you come share it over on my blog at melsdaisypatch I’m sure there are a lot of people out there who would love to make one of these.
Beautiful! Gosh, I wish we were close I desperately need one for my 3 yr old son and don’t know how to use a sewing machine :/
Send info to my email at [email protected].
A bit of help with making these blankets is first take an off white cotton and just make the grid—-meaning the part with the plastic pellets. Then add the front and back and sew that on to the grid. Very easy to make but tedious. Grid makes it easier. Make it first!!
Do you think one could just get blanket batting and, after sewing the pocket, lay it inside to line the whole thing before sewing the long lines and filling? I imagine it would add cuddliness without having to stuff each little pouch individually, No?
I think that would be a great idea @DeeDee–good thinking! I live in a small town and was just really lucky to find batting in my town-so that is why I went that direction 😉
I always use batting just like a quilt. You should make a grid first showing your squares. Then add batting and the front and back of the blanket
THANK YOU!!!! THANK YOU!!!! THANK YOU!!!! My mom made a weighted blanked for my 9-year-old son that is on the Autism Spectrum. It’s an AMAZING blanket and she’s an AMAZING seamstress. I don’t have the heart to ask her to make another one as a back up. These instructions are “Molly-proof” and perfect for a beginner like myself.
Again, THANK YOU!!!!
Molly, That made my day THANK YOU! 🙂 Let me know how it goes! POST a picture on our fan page when it is done! 🙂 <3 Cj
This is great but it’s not washable. Projectlinus.org has a great pattern that makes it washable and is much easier.
Are the ones that are stuffed with sheets just as effective as the ones stuffed with poly-fill?
No
I’ve recently figured out that my 4 year old daughter may be on the Spectrum (still waiting on official diagnosis) she does so well with a weighted pillow to calm down I’m positive this blanket would work wonders! I’ve seen them for sale but are sooooo expensive and hubby and I are retired and on fixed income so I haven’t been able to buy. But I have all of these supplies already on hand. I’m so excited! Thank You so much for posting! Have a Merry Christmas!
I’ve never heard of a weighted pillow, how does one use one other than under their head?
Typically a weighted pillow is used at school while the child is sitting. It is placed on their lap to help them stay grounded.
Thank you for the helpful hints on how to make a weighted blanket. You did an excellent job. I am making one for my grandson. This will be a first time blanket.
Thank you! I’m glad you could use this!
Thanks for the instructions. My mom just made a blanket for my daughter and we learned the hard way that not all poly pellets are the same. I ordered POLYETHYLENE pellets from ebay. These have a very strong odor and don’t seem to be appropriate for this use. Thankfully the seller was gracious and is sending me polypropylene ones at just the cost of shipping. So BUY POLYPROPOYLENE pellets. (We had to rip apart the blanket and start over…. ugh!)
I’m sorry to hear that, mine had no odor at all
How did you not smell it before you finished the blanket?
Do you think your pattern here could be adapted to make one of those snuggli robe type blankets. I have an 9 year old son and I think he would do better with one those then taking a blanket around with him?
He does not need to carry it around. Place it on his bed. Mostly much younger kids drag it. Not older kids
This is really a nice idea.
Hello
hi, love the blanket, would you have a pdf or smaller printer friendly copy for me please?
Kat-I don’t have one, I will try to work on getting one made! 🙂
What a great project!
all I can say is INCREDIBLE, I can not wait to get started
Ths is a great ttorial and I really like how you had plenty of pictures. I have made these before and they really do help soe children. I made mine out of fleece but it depends on what fabric appeals to the child too.
Hello CJ, I was getting ready to spend over $100 on having one of these made for my autistic son for Xmas, then I thought- pinterest must have something. Thank you so much for this tutorial. My mom has been sewing everything from my childhood wardrobe to my kids PJs and she is always looking for new fun things to put together. We will enjoy making this together for my son, who will definitely get lots of use out of it.
Thanks again!
Nora, that makes me smile! I am so glad you can make one together! I want to see how it turns out! post a picture to our Facebook page so I can see it! Merry Christmas! -Cj
Make a grid for the inside. Then cover it with batting and then the outside of the blanket
How much of the poly-fil did you end up using, I’m planning to make a four lb blanket for my daughter.
Ciara, I used about half a bag full
hi can u just please tell me what kind of the baby blue material fabric u used
Hi Alicia,
I am sorry I just am now seeing this. It was a fleece ish type of fabric
im not a robot
CJ,
Thank you so much for the time it took to make the weighted blanket directions. I’m going to rock that one out for my own Grand-Children. Your other projects look fun to do also, so I’ll try some of them too.
I love to do small, uncomplicated sewing projects so this will work great. Enjoy your day!
Tammy
I hope to hear how it goes! Keep me posted!
I made one of these yesterday. I have a top tip for anybody making one. Weigh the pellets and then put into a little plastic bag and tie the top closed, you’ll need lots. I get rolls of 500 bags for £1. You’ll be able to pop the bag plus pellets into each section. It speeds the process up and you’ll be less likely to break sewing machine needles as you sew over stray pellets, I learned that from a bad experience.
Fab instructions, great product. My son is now purring like a kitten. A must have if you have children on the autism spectrum, I wish I’d made one sooner. Thank you for your instructions.
Elizabeth, Great suggestion! I love the idea of using them in baggies! Smart! I’m so glad that these instructions were able to help you! Glad to hear your son is purring. 😉
Would the blanket be washable if you put the baggies in it still? Just curious if the dryer would melt the plastic.
Make the bagged from cloth.
CJ….I have so enjoyed reading the post on making a weighted blanket. It was very precise and my fav parts are the lil emergencies that kept u getting up from the machine!!! Haaahah!! I had the same problems years ago when I left work to have the best job in the world..being MOM! I’ve never regretted it even now they’re grown. Same lil emergencies only more complicated!!!! Haaahah!! Enjoy your decision,your girls and the lil emergencies that will someday be your cherished memories. I look forward to reading your blog. Oh and I adore the name of blog too!!!!!! DC
Thank you DC!
Thank you so much! As a person with a sensory processing disorder this is so wonderful to know I won’t have to spend money that could go towards hearing aids on an expensive as all get out blanket. God bless! 🙂
I’m so glad! Have a great day! Let me know how it turns out!
Glad this helped. Let us know if you were able to make the blanket
Thank you so much for the tutorial! I made a blanket today for my son. I am a beginner at sewing and was able to follow your directions easily, (but it did take me twice as long.)
Erin, That makes me so so so happy to hear! I hope you’ll update us on how he likes it! Well done! I’d love to see a picture on our FB page if you can post one! Here is the page: https://www.facebook.com/iLoveHeartMyKids/
How do you clean these blankets when get dirty?
Cj,
Thanks for the tutorial! I’m so excited! I can’t wait to make this for my kiddo. As you said these blankets are very expensive. Thanks again!!
Stacy, you are so welcome! Post on our Facebook page when you are done! I’d love to see it!!
Hi, and thank you for this wonderful tutorial!! I was wondering do you think I could put lavender leaves or oil in with the beads? Like they do with the rice or flax to give it an extra boost. My daughter loves lavender and has very bad anxiety and sensory/processing issues. Along with other things. I was going to use flax or rice but I don’t know how I’d wash it.
Thank you
I don’t see why you couldn’t! Let me know how it turns out!
I love you!
I desperately need a weighted blanket for myself but they are so costly! Making one (and mom buying the supplies) was my only option. I had ZERO idea where to start. Your tutorial is AMAZING! I’ve read the directions start to finish, as you recommended, and gathered the supplies. I feel totally prepared for this project and being someone who suffers from inexplicable anxiety, that’s really saying something…
Thank you for all the time you put into this. It’s greatly appreciated!
If it goes well, I have a list of people who could benefit from one as well!
Christina, I am so so so happy to hear this! I’m glad to hear it! Please please please share on our page when you’ve made one! I can’t wait to see it!
Love this tutorial! I’m making one for my daughter! Just wondering if this is washable with the batting in there… I’m cercerned it will mat up? What has been your experience?
I honestly have only given these blankets away. I haven’t had anyone tell me the batting matts up, but it sure might. You could sew on a sheet of batting.
So at the beginning where u r talking about first sewing the 2 pieces together. You wrote (I copy and pasted this) “You need to sew your fabric right sides together. Sew the 2 long sides and one short side. Leave one “short side”–which we will now refer to as the “top”–open so you can flip it right side out.” I got a little confused, did u sew it inside out and finished the top right side out? I think either way would look good. 🙂 But anywho I haven’t sewed in 13 years and I felt that ur instructions (except that little blurb) was a sewing for dummies and very easy to remember each step. Thank you for your time, and I look forward to reading ur other blogs.
Hi Lisa.
Yes, farther down in the instructions it says to :
First you want to fold over your rough edge (this is easier if you do use an iron–to press down your nice edge, but again, I didn’t.)
14 fold over your edges on the last row
Fold over your “rough edge” so you have a clean edge when you sew it together
Remember when I told you to leave about 2 inches from the edge, this is why, after you fold over your rough edge, you will want to “finish” sewing up your long columns (I had 5 columns-you may have more or less depending on your blanket size.) Finally you stuff your final row of 5 pockets (or however many you have) with your poly pellets and your stuffing. CAREFULLY take to your machine and sew (with your folded over edges) to make a clean looking seam. YOU ARE DONE!!!!!!!
I was afraid that if I put that in there at the beginning some may sew it together on top and be unable to fill it. Thanks for asking!-Cj from I love my kids blog
Hi, I was wondering if you have gotten the poly pellets at that price recently? I have been trying to find a 25lb bag but everywhere i look they are over 70$.
Thank you
Hi Saylem,
I have not shopped for them recently. I think this place might be worth a call: http://jmnhl.tuaxg.servertrust.com/Default.asp as their website is down for maintenance. Good luck! let me know if you find some!
Cj -I love my Kids Blog
do you sell these blankets?
AWESOME find! It’s 12:30am, and I’m ready to go grab my machine! Thank you so much for sharing a super easy to follow diy! Will try to post pictures when I get mine finished!
How did it Go Bethany?
My mom and I just finished making one of these to help with my PTSD and panic attacks, so thank you so much for this tutorial! One tip I have: instead of sewing three sides shut and filling the blanket in from the top, leave the top and bottom of the blanket open and sew a horizontal seam across the middle. This makes it a lot easier to fill in since you can work your way out from both ends of the blanket!
Excellent suggestion!
Thank you for your honesty, humor, and directions for the weighted blanket. My granddaughter needs one, and your tutorial is a life-saver, since I had never heard of a weighted blanket before. You are delightful…thanks again.
Thank you Ina!
When I made a weighted blanket, I cut the top off of a 2 liter soda bottle to use as a funnel. It fit well into the columns and I was able to pour the measured pellets easily into the columns….kept my floor clean too!
Genius!
I used the long cylinder vacuum cleaner attachment. In the beginning I bunched up the fabric so the attachment would reach the bottom. But as I got to the top the length worked perfectly.
A cardboard wrapping paper tube would work, too. Love, love, love your tutorial and all the reader suggestions! Off to buy fabric. 🙂
Would you be interested in making one to sell???
Hi Kate, I can’t at this time, shipping would be a bear for it due to it’s weight, but there are websites that do sell them if you did a search. Good luck!
I found this tutorial on pinterest and I must say thank you. This was so easy to follow. I just made one for my son and did a little border around his, I think it turned out great.
Amy, that makes my day! so glad to hear it!
What width was your fabric? I am confused how you got a 36×60 blanket from 2 yards of fabric?
Oh boy, I can’t remember, it was a scrap that she had. So I don’t know what it was originally.
It’s called “railroading” when you use a one yard length (1 for each side of the blanket) of 60” wide fabric (using the natural width as the blanket’s length). It’s best to use fabric with a random pattern, a linear pattern, or solids so the fabric doesn’t have a definite lengthwise oriented pattern which would make the blanket appear to be made the opposite direction that is “should” run.
I’ve been wanting to make a weighted blanket for myself for ages! I notice that when my husband is out of town, and I have a hard time going to sleep, I tend to fall asleep faster when I go to the sofa and wedge myself into the lengthwise crevasse in the sofa. I think that the sensation of the pressure calms me somehow. As a kid, I would wedge myself between the box springs and mattress if I had more worries than usual that made it harder to fall asleep.
I think I will use cotton flannel with a plaid pattern on it and have the other side be a slicker satin finish fabric. That way, I’ll have lines to follow when I sew the columns and have a cooler satin side to the blanket if I get too hot.
If I recall correctly, most fabrics in the store are either 44 inches or 60 inches wide.
I think that if Cj started out with 2 yards (72″) of a 60 inch wide piece of fabric, then if she unfolded the fabric all the way and laid it flat, she would have a 72 inch long by 60 inch wide piece of fabric.
72 divided by 2 is 36.
So if Cj folded the fabric “not with the grain of the fabric”, then that is how she could divide the 72 inches long length of fabric to get the 36 inches. and the 60 inches is the width of the fabric.
Everyone, please feel free to double check my logic.
I am thinking about make a couple of these thanks your amazing steps it doesn’t sound to difficult. I have been looking at the poll pellets and they are different kinds, some look clear others white. Does it matter?
Hi Steph, I sent you an email too, but just in case you didn’t get it. As long as they are waterproof then it doesn’t matter!
Is the poly fill necessary? I’m thinking about just doing the pellets but I’m not sure how that would affect the feel of the blanket.
It isn’t necessary, it just makes it softer and makes it feel more like a regular blanket! Give it a try and let me know how it goes!
Fantastic tutorial:-) Tanks
You’re welcome!
Thank you for the weighted blanket tutorial. So wonderful for you to tell us your errors. Makes it more real somehow. These are the equivalent of the thunder coats that anxious puppies wear. It’s the weight and the way the fabrics sits closer to the body. Thanks again
Word of Caution!! Please do not make anyone a weighted blanket just because someone asked you to. You may not know this,but there have been some terrible accidents (some of them fatal!) caused by well-meaning but uninformed people, who want to help their friends and family by making a weighted blanket because they can sew. Please consult the recipient’s professional care providers beforehand. There are strict guidelines to follow regarding these blankets such as: (a) does he/ she actually need this therapy? (b) if so, what size and weight should it be? (There are guidelines for matching the blanket to the size and weight of the recipient. One size does NOT fit all!)
The recipient’s care providers,such as the doctor or Occupational Therapist, etc. Should make the decisions and provide the necessary info before any weighted blanket is used with an autistic person…..especially children. Please be CAUTIOUS. DO YOUR RESEARCH, FIRST,
How do I know this? Because my daughter asked me to make one for her child. So I looked up how to, sew one, and found all this information which I feel compelled to share with you now. It is kindly meant, as I know only too well how much we all want to help.
Than kyou Sharron, Yes, make sure it is right and good for the child! Definitely don’t want anyone to get hurt. I suppose if they are searching for how to make a weighted blanket they have already gone through the process of determining that it is a need. Thanks for your cautionary advice! It’s always better to be on the safe side!
Hello! I’m an autistic adult and I’ve been on the lookout for an easy tutorial on making a weighted blanket. I’m short on money and inexperienced with sewing machines — I’ve been hand-sewing my whole life but just recently I was given a sewing machine. This seems like a great alternative to buying one, as adult-sized blankets are not very affordable.
Thanks!
I am curious as to why one lady in the comments said that these are not washable! My beads are washable so why wouldn’t the whole blanket be?
Some beads are not washable. You should be fine!
Thank you for the tutorial. I was wondering what to weight these with
You are welcome!
Thank you sooooo much for this brilliant tutorial, I’m just about to start my first one for my nephew for Christmas, I’ve been putting it off for weeks cause it looked so difficult but you’ve made if seem very doable , thank you ?
Post your finished product on our FB page I’d LOVE to see it!
These instructions are fantastic! I teach math and I find myself struggling with counterintuitive instructions, diagrams from the fifth dimension, and the textbook’s smug assumption that I only think in one mode. None of that here!
IF ONLY IKEA’S INSTRUCTIONS INCLUDED MISTAKES. Right?
Thank you for the wonderful tutorial. My adult daughter has severe chronic anxiety and asked for a weighted blanket for Christmas so I either have ten days to order and ship one I can’t afford or I can whip out the Rit, the flat sheets she never uses, and buy some pellets! I especially like the inclusion of fiber fill to give volume so she won’t feel like she’s covered in beanbags. Ugh. Easier on the seams, not to mention the beleaguered seamstress that rails against reverse stitching every seam. Time saved is pennies in the couch!
You crack me up! 🙂
Awsome!!
I did this but used the puff quilt method.
What is the puff quilt method?
CJ,
Thanks for such a comprehensive tutorial! I have been sewing for many many years and was stumped on how to accomplish this one. I am planning to make a 15 pound blanket for my son with Schizo affective disorder and hopefully this will help calm his sleep patterns. We will be using denim/corduroy so it will be durable and washable for many years.
Thanks again for such a complete tutorial
M
I can’t wait to hear how it goes!
Helpful hint for the “little” messes your children created. If you have a old pair of nylons, cut one of the legs off and rubber band it to your accessories hose on your vacuum cleaner. You can vacuum all the little poly beads without them being sucked up into the bag.
What a super idea!
Is it washable with the pellets?
When seeing with the poly pellets make sure your stitch length is a shorter etch length otherwise the pellets will fall between the stitches. Lol experience.
Oh good call!
Can you use polished aquarium gravel? It seems much more cost efficient than the plastic pellets and more natural. Thanks
That is an excellent question. I’ve never thought of that. It could certainly withstand washing, I don’t know how they would do with drying, I’ve never had fish before. I may have to do some research and give that a try! Let me know if you end up making one with the gravel!
Hi CJ! I just bought the supplies I need to make this blanket for my granddaughter who suffers from ADHD, ODD ( Oppositional Defiant Disorder), mood disorder and possibly Aspbergers. I’m hoping it will calm her down and not have so many meltdowns, knowing she can have her blanket to help her calm down.
I love Montana! It is so beautiful. My parents built a log house around Sula, in the southwest part of the state. It’s now the family cabin and we love spending time there!
Thanks for the great tutorial!
I can’t thank you enough! I have a pain/central nervous condition called RSD and stay at the highest pain level on the McGill pain scale. A lot of my RSD friends say these have worked well and I just can’t afford one. However, my mom is amazing on a sewing machine. I truly can’t thank you enough.
I hope you’ll keep me updated after you’ve used it. I’ll pray it helps with your pain!
Wow, I can’t wait to make one! People have been telling me for ages that I need one, but they are so expensive! At present I sleep with about four blankets on the bed; it’s the only way I can get to sleep with my current insomnia and severe anxiety, but it gets just a little warm! I think I am going to make one with minky and probably cotton. I hope it will help calm me down during my meltdowns. Thank you so much for your free tutorial. I appreciate you.
I hope it helps! Keep me posted how it turns out!
Do you sell them? I’ll buy one from you. My son is diagnosed with autism. He weights 38 lbs.
I don’t sell them, they do take time and shipping would be a bugger! I bet you could make one though!
Thanks for the tutorial. I’m thinking about making one of these blankets. Here’s a tip for you. When you have a bunch of pellets spilled all over the floor, put a tall sock over the end of your vacuum hose and hold onto it tightly. Turn on the vacuum and collect all your little treasures in the sock. Before turning off the vacuum place the sock over a container like a bowl or box and turn off your vacuum. The small peices will fall out of the sock. This make for fast cleanup of beads, pellets, etc.
Great idea!
wondering about washing a weighted blanket??!
As long as you make sure you are using poly pellets that hold up to heat you should be fine. They wash just fine, but are SUPER heavy in your machine. You can tumble dry on the lowest heat setting your dryer has!
Is there anyway of making such a blanket that can be washed?
As long as you make sure you are using poly pellets that hold up to heat you should be fine. They wash just fine, but are SUPER heavy in your machine. You can tumble dry on the lowest heat setting your dryer has!
I’ve read all the comments but still do not see how to wash these, especially if using plastic bags for the pellets.
Also, 36″ across does not seem like much width. I’ll be making one for a little girl who is 49″ tall. That would be about 2 yds (72″) for growth. But fabric comes in 60″ or 44″ width. So I’m a little confused. Is this doubled for front and back?
Math is not my strong suit. Appreciate the tutorial otherwise. I love your sense of humor.
Yes, I did have it folded over in half for this particular blanket. I made it 36 across because he was only 20 inches across and even me, in my done growing stage of life am only 24 inches across. We want the weight to be ON the person so it doesn’t have to be particularly wide or large. Hope that helps!
It’s obvious you know what you’re doing but this was clearly a labor of love! Thanks for sharing such a thoughtful gift!
Thank you Teresa!
My grandson has been itching to have one ever since his therapists suggested it. He sleeps under piles and piles of blankets every night. I am going to make this within the next week. I am so excited, and I thought your tutorial was excellent. I’m no seamstress, but have made comforters in the past. Your directions (especially the mistake tip-offs) are excellent. Thank you so much! I can tell that you’re an awesome mom – you roll with the messes!
Oh I can’t wait to see how it turns out! Keep me posted!
Great instructions…I am going to attempt this blanket for my grandson, Conner. He has Downs Syndrome and high anxiety. Thanks so much for a great tutorial!
Hope it went well!
I love your blog! Very understandable and funny! I have anxiety and today is the first I’ve heard of a weighted blanket. I am not sewing machine savvy, so I’m going to try this by hand. ? I will let you know how it turns out. Thanks for the instructions and making me laugh!
How did it go?
I was asked to make weighted blankets for a friends two boys. I was thinking of making the squares as an insert with ties on each corner, and making a duvet type cover with loops to create the outer “shell”
Do you think this would work and be easier to wash? My thoughts are throwing that blanket in the wash too much may ruin it….
I’d love your opinion
I think that should work just fine! Let me know how it goes and about how long it takes to sew it that way! Good luck!
Hi! Cute blanket!
Just a tip about little girls and small things that they love to spill… (This continues well into their teens) try putting a pantyhose over a a vacuum wand… Pick up jewlery, beeds, or anything charishable you don’t want to actually suck up in the vacuum. Little girl tights work for even smaller things like course glitter!
Thanks for tutural!
thanks Rachael!
How do you wash the weighted blanket ?
As long as you make sure you are using poly pellets that hold up to heat you should be fine. They wash just fine, but are SUPER heavy in your machine. You can tumble dry on the lowest heat setting your dryer has! Or even a trip to the big washer at a laundry-mat
My daughter suffers from anxiety. I am constantly searching for noninvasive ways to help her. I started researching weighed blankets and quickly discovered that they’re well beyond our means. After coming across your website, I am able to help her after all. Thank you so much for posting these free instructions. All struggling parents need to see this. This is one of the best examples of altruism I’ve ever seen.
Katerhine, you just made my day! Thank you! Good Luck!
Thanks!!! I pretty sure I’m going to make this for my daughter for Christmas!!
Let me know how it goes!
Hi if you are using a fabric with a pile or fluffy material use a Walking foot. Every sewing machine can be fitted with one,you can get one at a sewing machine shop.
I am going to have to research this! I have never heard of it!
My adult son is on the spectrum and I’ve been wanting a weighted blanket for him, but the prices are exorbitant! These are also an excellent item for anxiety and insomnia. THANK YOU!!!
THANK YOU! I looked up weighted blankets on Amazon last night and holy cow are they expensive! I am not a world class sewing maven by any means but I think I could manage making one of these.
You can do it Ashley! Good luck, keep us posted! I want to see!
Please answer the question I see posted many times: How is it possible to wash a weighted blanket like this? If my child is 100 lbs, the blanket will be 10-11 lbs. I don’t think my washing machine will like that!
As long as you make sure you are using poly pellets that hold up to heat you should be fine. They wash just fine, but are SUPER heavy in your machine. You can tumble dry on the lowest heat setting your dryer has! My recommendation is to take it to a laundro-mat and use one of their giant machines for huge loads!
This question has been answered multiple times throughout the comments. Just scroll back up and you will easily find your answer. Certainly we don’t expect CJ to answer the same question over and over and over — although she kinda does!
Yes you can wash it. It will be heavy in your washer. You may want to use the xl washers at the laundromat.
I wonder if it would work to do this as kind of a rag quilt style where you sew and stuff the squares individually and then sew together with all the edges on one side.
I think that would be so adorable and I think it might be almost even easier!
I already have request to make blankets – your directions are very easy to follow.
Good luck Grandma of 14!
I’ve been reading a lot about weighted blankets lately and the cost to buy one.
I’ve checked out a couple of sites that with instructions to make the blanket. I like the blanket made here.
I’m wondering if it would be easier to create separate “tubes” with the fill in them instead of filling each little pocket then sewing the pockets closed to be part of the whole blanket.
So in my case, sew the long divider lines from top to bottom then instead on filling each little “pocket” of one row with the beads and filling then sewing each row shut, create instead tubes a little narrower than the “pocket” and as long as the blanket (well a couple of inches shorter). Create as many tubes as needed to fill the width of the whole blanket. Fill and sew each pocket of each tube. This should be easier because working with only one tube at a time would be lighter and easier to maneuver when sewing and could even be hand sewn. When the tubes are complete simply slide them into the original columns sewn into the blanket. Maybe fix the final opening or the “top” in a way it can be opened (zipper, snaps, buttons, Velcro), so the tubes could be removed and the outer blanket washed. I would think that the material should be pre-shrunk before the assembly.
I don’t think the tubes would move once they were inserted but on the off chance they did a little Velcro at the top would help hold them in place.
I’m not a seamstress, Mom was, so I watched her create as a child. I am a builder of sorts and in my mind this could work.
Another option could be to just create the tubes and Velrco or button them together. In this case the tubes could be long (from top to bottom) or narrow (side to side). I can see, in this case, the blanket growing as the child did.
Paula, I think you are a genius! That does sound amazing! I think it would be a bit easier and easier to manage ad easier to wash….one of these days if I ever get some spare time I am totally going to try this way! Great idea!!!
thank you for the tutorial. I ordered a weighted blanket online to help me sleep in August. To date I haven’t received my blanket and yes I paid a crazy amount of money for it. Turns out the site I bought from was a scam. But now after watching this I am going to the fabric store to make a blanket!!
jd, That is SO SO SO SAD! I am so sorry! 🙁
Have you thought about making a cotton blanket and then putting an IKEA duvet cover on it? Or even starting with a duvet and sewing a row at a time?
That is a great suggestion!
I found your instructions very clear and easy to follow. Thank you I want to make these one for me, as I miss a heavy antique quilt my mom had. It literally used to hug me all night, having rheumatoid arthritis from childhood I was very comforted by the weight in the quilt.
???
-Suzanne
I am so glad it was easy to follow Suzanne! My grandma has a quilt like that too, of I loved it. It was crushed velvet on top, a deep purple, so pretty, so soft and so wonderfully heavy! I miss it!
Great tutorial!
Did you adjust the bead measurement for the weight of the glass or are the beads and the glass 2.8 ounces? Also, is it necessary to adjust the weight of the beads to account for the weight of the fabric and batting itself?
Hi, you did a great job of explaining the process. I’m a seamstress, been sewing for 50 years. I think if you put wrong sides together then sew sides and across the middle it would be easier. You wouldn’t have to reach all the way to the bottom to put in the filling. Only half the way. Do one end then the other end. I think I’ll try it.
Would this help a dog with separation anxiety
So, each pocket has stuffing and pellets?
This isn’t great info thanks so much for sharing.
Dang auto correct, thanks for posting this tutorial it’s great. Please delete the previous post.
Made me laugh! 🙂
Good luck!
What do you think of using airsoft gun plastic pellets for the weight? Like these for example https://www.amazon.com/0-20g-Plastic-Pellets-Airsoft-Bullets/dp/B01M4LG8WS
I wonder if its going to be loud or if the material will degrade when washed
I have been wanting one of these for a long time but couldn’t justify the expense so will DIY with your directions and hopefully save myself a small fortune 🙂 hopefully some heartache too learning from your mistakes although I already screwed up by making my lines with my fabric inside out, ugh! Thanks so much for this post and the video! You have really motivated me- I am sure it will take me more than 2 hours but it will be worth it! I will keep you posted. By the way- loved all your hilarious parenting comments throughout!
Thank you so much for all your help !!! The best blanket I have ever made thanks to you and your instructions
Hi CJ,
Thank you for these wonderful instructions for a weighted blanket!! You explained each step perfectly and gave me the incentive to perhaps try to make one. You have a great knack of making the reader feel like you are speaking directly to them – loved each tip, mistake and insight to your beautiful family you shared!!
Much blessings to you and your family <3
I have started making weighted blankets for grandkids and friends of the family. One hint I would share that I found is to use a long wrapping paper tube inserted in the columns to deliver the poly beads to the bottom. They could also help in tamping in the poly fill. Less beads hung up to interfere with the sewing of the horizontal rows.
Excellent tutorial!
Thank you
After multiple washings, does the poly fil stay nice and smooth or does it bunch up inside each square?
You’ve inspired me to dust off my sewing machine! I will be giving this a try for myself… to replace the mountains of blankets I sleep under. ?
I’ll share on my page, TA-DA Learning. Thanks for the great tutorial!
You’ve inspired me to dust off my sewing machine! I will be giving this a try for myself… to replace the mountains of blankets I sleep under. ?
I’ll share on my page, TA-DA Learning. Thanks for the great tutorial!
Thanks for this simple tutorial, I have just finished a full size weighted blanket for my 18 yr old daughter. She loves it. It was sooo much cheaper to make than it would have been to buy. Again thank you x
Thank you so much for this tutorial! I have a weighted blanket, but it doesn’t have the square compartments, so the pellets just go to a random corner automatically unless you keep adjusting it (and it can only be used lying down). :\ I was thinking about buying another one, but they’re so expensive, especially in adult sizes. Now I can make one myself!
I think I will use Victoria’s suggestion of putting the measured pellets in fabric bags before putting them in the blanket. Sounds like a sanity-saver, ha ha.
I really can’t thank you enough. 🙂
I love this. Thank you for posting this tutorial.
Can you tell me how many bags of poly fill you used for this size blanket? I am not very good at these things.
thank you,
Carrie
Hi I have a 14 year old who would love this. Hes 6ft though. Can I just multiple the measurements. thanks
Hi I really felt that your explanation made it easy to figure this pattern out! However, I may sound like an idiot, but I can’t understand how the blanket can fit under my machine foot especially when you’re moving down the channels (like 5 or 6 rows in. Maybe I would need a special machine? I’ve sewn alot and even made blankets but never these multi channels and filled no less! Any help?
Penny
I made myself a weighted blanket today. I 100% love it. Thankyou so much for posting this tutorial.
Bought a king sized sheet from Goodwill to make my own! I got the poly pellets from Amazon using gift cards I got from using Microsoft Rewards to bring down the price. Hardest part for me was calculating the weight that each pocket should hold. Not trying to advertise here, just give people ideas on how to bring down the prices a little. Thank you for the great tutorial!
Love your tutorial, I thank you. I did mine for my grandson. More or less like you, but like the idea to use the water proof shower curtain and make the cute cover to use.
Preparing to make another one. He is 5 now. Needs a bigger blanket.
You made some nice points there. I did a search on the subject matter and found most people will go along with with your website.
I am woking on a blanket for my daughter. Ive wanted to add velcro the back panel the weights so that I can add to it as she grows. Im just very very confused about where the weights should go? How many rows should i make. the blanket is 36 x 50 and she weights 80 pounds. Can you help me?
Great tutorial! Store-bought weighted blankets can be SO expensive. We used one of those rag rugs, sandwiched between two layers of flannel. She loves it, but it’s SO hot in the summer. I can’t wait to try yours. I have a feeling it’ll be a hit.
Rachael@growawaywithme
Hello! I love your tutorial for the weighted blanket well done! You are clever! I am wandering how I can use the method for measuring the weight in Kilograms? I’m not quirky with numbers so any comment will be greatly appreciated.
You probably need to measure the weight in grams, not kilograms. For this task, go to Google and type ounces to grams, there you put your numbers and the chart will convert it for you… Good luck
Can you use soft and minky fleece? Or would you not recommend it?
Very clear instructions. I cannot afford an already made blanket because I want to give them as Christmas presents.
I think i can! I think i can!
Good luck Annie and all the best. We would love to see a photo of your finished project. Please feel free to post a photo to our FB page https://www.facebook.com/iLoveHeartMyKids and you can contact through messenger with any questions
Can you sew the batting to each wrong side before you start to sew the blanket together?
Yes! That would help he batting stay in place
I have restless legs and wondered if a weighted blanket would work for me. I thought I would make mine as a “quilt as you go “ because I’m not sure if I want it to be a full-size blanket.
I love your humor! My first degree was in home ec, I taught them to press, but I have to admit I don’t!😀 Thanks so much!
Cj: ‘I have never made one for anyone with restless leg syndrome, but I think it might be worth a try. I do have a friend who suffers from that and I know how miserable it can make her. Definitely you should try to make a small one and see if it helps! It would definitely be worth the time especially if it does work! I am glad you liked the post, and I’m relieved to hear that even a home ec teacher skips that ironing part when she’s working on her own projects. We can be non-ironing rebels together.🤫”
I made a weighted blanket for my daughter and have a tip that might be helpful to others. I had a section of PVC pipe left over from another project. It was just large enough to put in the openings and then I used a funnel to put the beads in. The slide really well and I didn’t have to do much shaking to get them in place. Even on the first row I just bunched the column of the fabric on the PVC. If your PVC pipe had a big enough circumference you could probably stuff the poly-fill through it also and use a yard stick to push it down in place.
Super idea!
I have made my sons weighted blanket this exact way (although I never thought of polyfill) and want to add that sewing the horizon horizontal lines with the pellets is a huge pita!!! Did you use any trick to help with this? Most of my time was taken up making sure pellets weren’t in the way of the machine.
It is tricky, I just went slow too, to make sure I didn’t break a needle on a pellet!
Thank you for the details!! I actually made the weighted blanked but used rice as my stuffing in a dollar store curtain and a duvet!! Looks wonderful and a lots cheaper!!
great idea!!!
Hi there
What size did you use for the adult blanket? Thanks so much
Dee H.
We used “fleece throw” that you get at any big box store. I can’t recall the exact size. sorry.
I have watched the video and read the blog and I’m still having a problem deciding on my pocket sizes and number of them?? Can you help me please?? I am doing a blanket for my 18 yr old daughter (she’s 5’ tall 120lbs) i get i need 12# blanket but is 2 yard pieces of fabric a good size? And i can’t figure out how many squares/pockets for that size??
I am working on making a calculator to help determine all the calculations, I will post it on the blog as i soon as I can!
I wanted to keep these instructions so I saved this in messenger. Now I am ready to start and cannot e-mail the article to me to print out!!! I’m sure it is just me!! 😳 can you email this to me? Please?
Do you know if you should include the weight of the fabric itself when calculating the 10% goal of the finished blanket? I bought fleece fabric and it alone weighs 3 lbs!
Hey Brittany, I’ve done a lot of research and some professionals say that the total weight should be `10% plus 1 lb and others say just 10% and others say 12%…so honestly, I think it’s just a guideline. I think it would be more based on your comfort level. If you think you’d like it a little on the heavier side then I’d not worry about the added weight of the fabric. Or adjust it a little bit but if it isn’t spot on, I think it probably okay! 🙂
Hi! I saw someone suggest using fish tank gravel as a cheap alternative to the plastic pellets! I think I’ll try that (I found a 5 lb bag for $4.99 so I think I’ll double up on that.) Just a suggestion!
I use a wrapping paper tube to get the pellets to the bottom of the blanket
Thanks for the brilliant tutorial.
I am about to make one but I am using a duvet cover. It has the advantage of a matching pillowcase and saves having to sew the three sides initially. I will cut off the button fastenings (and use those on something else!).
For stuffing I buy cheap pillows (usually covered in papery stuff that I use as interfacing on other things!) Yes I like to find cheap alternative uses for things lol.
Again thanks for making mistakes first and saving me the stress lol
Yvonne
My adult daughter has a weighted blanket. She has a serious social anxiety problem as well as being bi-polar. It is amfazing what a blanket like this can do as far as calming. Just thought you’d like to know.
What kind of fabric did you use?!
WOW! I love this! How much did it cost you to make these?
Has anyone tried making the blanket out of cotton/muslin and then making a duvet cover over it so you can strip off the cover and wash it?
I have a fun fact for you to add you your blog that might make cleaning up a little more fun. My father worked for a company that makes the small pellets you use for the blankets. I wanted to let you know they actually have a name. They are called “Nurtles”. LOL I love to tell my dad that he is a retired “Nurtle” maker. My Sisters and I would collect the Nurtles that fell from his pockets, which made us “Nurtle collectors” and my brother used to like to spit them at us. He was a “Nurtle spitter.” So if they get spilled again you can can just say, “Oh Nurtles!” Hahaha. I thought that you might enjoy that.
Have you thought of trying to make tube inserts with the 5 pockets that you stuff with the batting and poly pellets and then inserting them into the blanket Then you could sew the 2 outermost layers on to them to secure the puff/poly pockets into it, Without having to put your arm all the way down into the blanket.
Thank you for your instruction.
1
1