
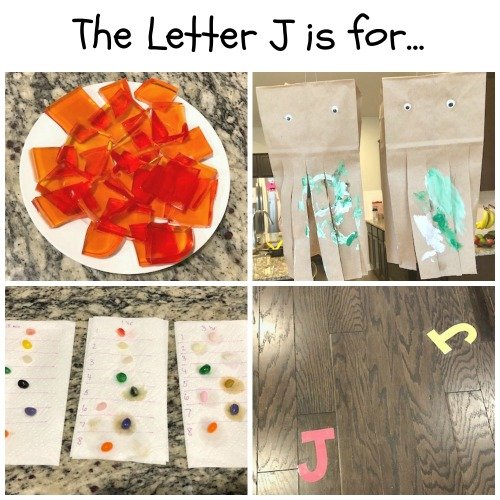
For the letter J activities I got to learn a little more about my son. I got to learn that he is not the only little boy who would rather do anything besides art projects. During a couple of our activities we had one of my son’s friend over to play. I had planned on doing two of the four activities with both of them. One of the activities was a craft which I had thought my son would be more willing to do if he was doing it with a friend. WRONG! Both of the boys had little interest in painting and moved on quickly to the next activity which was a movement activity. So if your child has no interest in crafts don’t worry, they are not the only ones and there are still lots of fun activities for them to enjoy!
Keep reading to check out the fun letter J activities that we did!
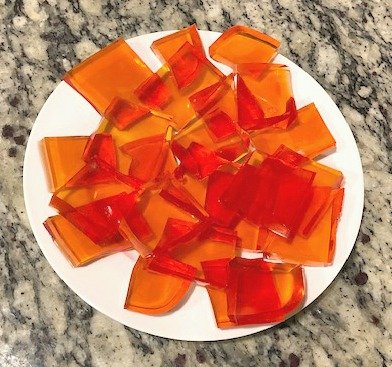
One of the letter J activities we did was make jello blocks.
What you will need:
- 2 3 oz. Boxes of Flavored Jello
- 3 Packets of unflavored Gelatin
- 2 1/2 C Water
How to make Jello Blocks:
- Mix the jello and gelatin powders in a mixing bowl.
- Pour the water into a pot and bring to a boil on the stove.
- Once the water is boiling carefully pour it into the bowl with the powders.
- Mix until all the powder is dissolved.
- Pour the mixture into a baking dish.
- Place in the fridge until firm (about 2 hours).
My mom used to make these for us when I was growing up. We called them knox blocks, but for this activity we called them jello blocks since that starts with the letter J. These are so fun to play with, jiggle and even more fun to eat. It is also fairly mess free, inexpensive and easy to make! Have you made these before? What do you call them?
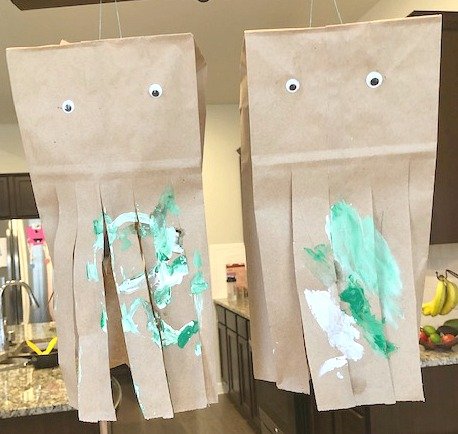
The next letter J activity we did was make jellyfish.
What you will need:
- Brown Paper Lunch Bags
- Kid Friendly Paint
- Paint Brushes
- Googly Eyes
- Glue
- Scissors
- String
How to make jellyfish:
- Let your child pick out the paint colors they want.
- Have them paint a paper bag as much or as little as they want.
- Let the paper bag dry.
- Once the paper bag is dry glue on googly eyes.
- Cut out tentacles from the bottom of the bag going up to the crease all around the bag.
- Cut two holes in the very top of the bag.
- String a piece of string through the holes and tie the ends of the string together.
- Hang your jellyfish for display.
This was the activity my son and his friend weren’t too excited for. They did have a little fun and they loved the finished product but as you can tell by the amount of paint the fun did not last long. Despite this I thought they still turned out really cute.
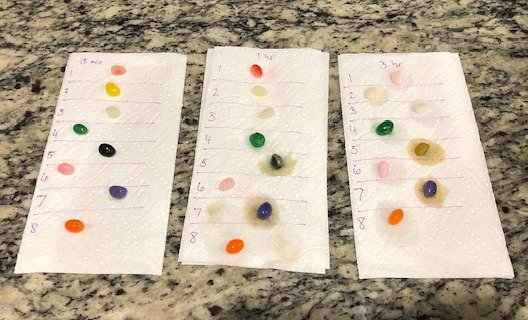
The next letter J activity we did was a jelly bean experiment.
What you will need:
- Jelly Beans
- Various Liquids
- Paper Towels
- Cups or Bowls
How to do the jelly bean experiment:
- Pick how many different liquids you want to experiment with. We chose a different liquid for each of the color of jelly beans there were in the bag of jelly beans we had. We ended up with 8 different liquids. The liquids we chose were water, whole milk, 1% milk, lemon juice, soy sauce, la croix, honey, and vegetable oil.
- Grab the number of cups or bowls that you have chosen liquids. Place three jelly beans into each container.
- Add one of the liquids to each bowl/cup so that the jelly beans are covered.
- Set up three paper towels that is numbered up to the number of the liquids you have.
- At 15 minutes remove one of the jelly beans from each of the containers and place on it’s corresponding spot on the first paper towel.
- Then at 1 hour remove a second jelly bean from each of the containers and place on it’s corresponding spot on the second paper towel.
- At 3 hours remove the last jelly bean from each of the containers and place on it’s corresponding spot on the third paper towel.
- Observe with your child what each of the liquids did to the jelly beans at each of the time intervals.
This was a fun activity. Both of my kids love science, especially experiments, so it was easy to get them engaged with what was going on. The only hard part of the experiment was waiting but once the waiting was done they had a lot of fun observing what had happened. It was also really fun for my husband and me to make observations as well.

The last activity we did for the letter J was jumping to the letter J.
What you will need:
- Construction Paper
- Scissors
- Tape
How to set up for jumping to the letter J:
- Cut out big bubble letter Js out of different colored construction paper. You can do as many as you want.
- Tape the Js to the floor jumping distance from each other.
- Have your child jump from one J to the next.
This was such a fun activity and a great one for my kids to use some of their bottomless energy. We had a lot of fun thinking of different ways we could jump. We did different animal jumps, we did a pencil jump, and many more. You can get so creative with this!
Which of these activities are you going to try? Which do you think your child is going to like?


1
1