For letter E we mixed it up a little bit, well just a little. There are still some fun crafts but this time instead of making a treat we did an experiment. Both of my kids love science, especially my daughter, so I knew that this would be a great activity to do while she was still on break. It was also great for my son because he doesn’t seem to enjoy the crafts as much as the hands on activities so it is always good to add in some of those as well. I hope you enjoy these fun activities we found for the letter E!
Here are the activities we found for the letter E:
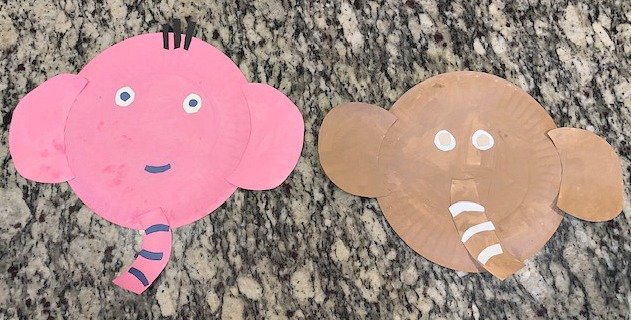
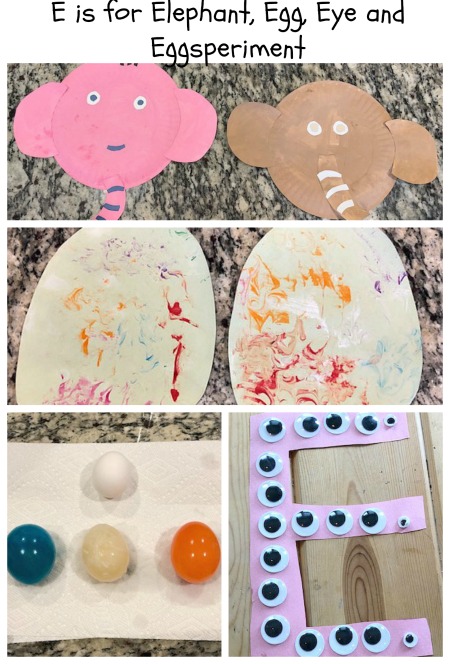
The first activity we did for the letter E was make elephants.
The supplies you will need:
- Paper Plates
- Construction Paper
- Scissors
- Glue
- Kid Friendly Paint
- Paint Brush
How to do this activity:
- The first thing we did was I let my kids pick out the color paint and construction paper they wanted to use. I would have let them just use grey, since that is typically the color an elephant is, but we did not have any on hand. This also made it so they could make their elephants unique to themselves.
- The next thing we did was cut out the ears and trunk out of construction paper.
- After those items were cut out I let the kids paint them plus paint the paper plate with the paint color that they chose.
- While they painted I cut out small pieces of paper to use as stripes on the trunk. I also cut out small circles to use for the eyes.
- We then had to let the paint dry (I let them take turns making their elephants so while one was drying the other could work on theirs).
- Once they were dry everything was glued onto the paper plate to make the elephant. My daughter then also decided to add some hair to her elephant.
This was one of the activities that my son wasn’t too interested in. He painted everything but once it came time to glue he did not want to do it anymore. My daughter on the other hand loved making her elephant and adding in her own little touches!
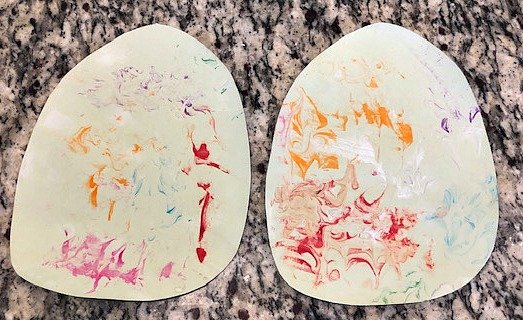
The next activity we did for the letter E was make eggs and paint them with shaving cream.
The supplies you will need:
- Card Stock, construction paper will not be thick enough
- Shaving Cream
- Scissors
- Kid Friendly Paint
- Big Dish, we used a casserole dish
- Tooth Pick, or some sort of thin object, we used a thin paint brush
How to do this activity:
- First cut out an egg shape out of card stock.
- Then let your child fill enough of a casserole dish with shaving cream that is the same size or a little bigger than the card stock egg.
- To the shaving cream you are going to add globs of different colored paints.
- Then use the toothpick, or thin object, to swirl the different paint colors all around the shaving cream.
- Once you are happy with how the paint in the shaving cream looks you are going to press the card stock egg on top of it.
- Remove the card stock egg from the shaving cream and set on top of paper towels for two or three minutes.
- Use another piece of card stock, I folded it in half, to squeegee the shaving cream off of the card stock egg.
- Let dry and then enjoy your unique creation.
This was a very fun and unique activity. My kids were very curious with what we were going to be doing with shaving cream, cause which kid doesn’t like the potential for making a huge mess. Luckily this did not turn into a huge mess but it did turn into a fun hands on activity.
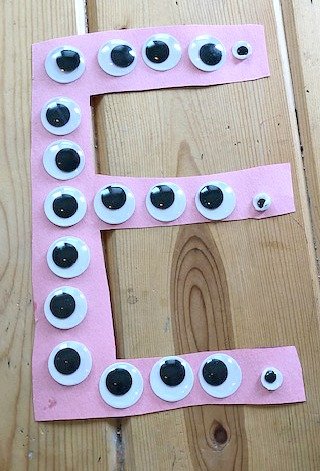
The third letter E activity we did was decorate a letter E with eyes.
The supplies you will need:
- Construction Paper
- Scissors
- Googly Eyes
- Glue
How to do this activity:
- Let your child pick out the color construction paper and the googly eyes they want to use.
- Draw a big bubble E on the construction paper and have your child cut it out.
- Give your child a glue stick and let them glue the eyes all over their E.
This was by far the easiest and quickest of the activities we did this time. So although my son is not the biggest fan of crafts he did participate in this one to it’s finish. His E is however not pictured above because he ended up using bottled glue, taking the cap off, and spilling glue all over his E. Now I know that glue sticks are the way to go!
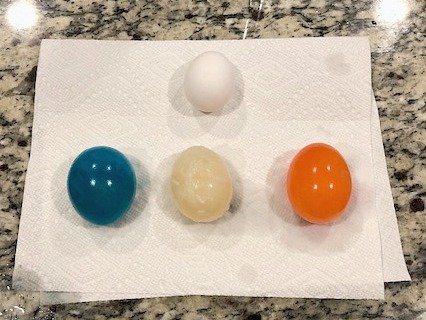
The final activity we did for the letter E was an experiment for bouncing eggs.
The supplies you will need:
- Eggs
- Vinegar
- Clear Jars
- Food Dye (Optional)
How to do this activity:
- To set this experiment up you will need to grab your clear jars, or cups, and place one egg in each. We decided do the experiment with three eggs. One for my son, one for my daughter and one without dye.
- Then add Vinegar to each jar until the egg is covered.
- Add dye and mix if desired. I used the cheap food coloring and did two drops.
- Leave for 24 hours.
- Dump out the vinegar, being careful not to break the egg.
- Add in new vinegar and food coloring.
- Wait at least another 12 hours.
- Remove the eggs from the vinegar and place on a paper towel next to an egg from the fridge.
- Observe the eggs with your children, asking them about the difference between the vinegar eggs and the normal egg.
- Let your child bounce the egg, but just a little. It may be a good idea to have them bounce it in the sink or have lots of paper towels on hand.
This was such a fun experiment. Both of my kids had fun checking on the eggs each day, asking when they would be ready. Then once they were ready they couldn’t wait to be able to touch them and explore what had happened. It was also something I had never done before so I was learning right along side of them. It was so crazy how different those eggs were in just a couple of days.
Do you have any other fun letter E activities that could be added to this list? Which of these activities do you think your child would enjoy the most?


1
1