
As time passes, finding the right gift to give parents, grandparents, and close family friends becomes exceptionally difficult. However, one thing I have found is that if you capture the youth of your children, or theirs, the gift becomes a priceless addition forever cherished. How might this be accomplished? The answer is simple. With an unbelievably adorable snowman finger art keepsake.
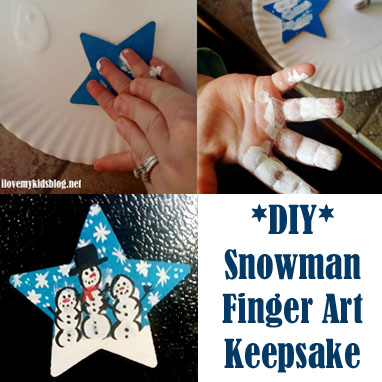 When I was a nursery leader in my church, I came up with this adorable idea to give to the parents of each child. With very minimal preparation, and a sliver of time, these snowman finger art keepsakes have still been brought up, years later. So, if you are a preschool or nursery teacher, this idea is ideal for you as well! It is perfect for newborns up to adults. No age limit is excluded.
Snowman Finger Art Keepsake
 Items needed:
- White, Blue, Black, & Red Acrylic Paint
- Paint Brush
- Wooden Star Cutout (I got a pack of 6 at Walmart for $1.50)
- Adhesive Magnetic Straps
*Quick Editors Note: You can use black and red sharpies instead of paint, however the sharpies act up when used on acrylic paint, so it isn’t as bold of a look. You can also use any type of canvas you want. From craft paper to a wrapped painters canvas, the sky is the limit there. Magnetic strips are not necessary, but from my experience making it a magnet and keeping it up year round is even more memorable then doing any other type of craft with it.
Step One: Paint the Wooden Star
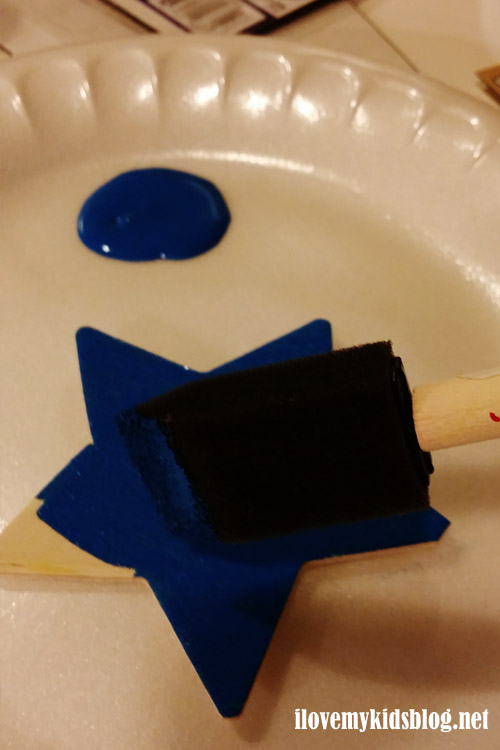 Using the blue paint, apply a thin layer of blue paint all over the front side of the star. This acts as the background and sky color. Let dry for 5 minutes.
Step Two: Prepare the Snowman
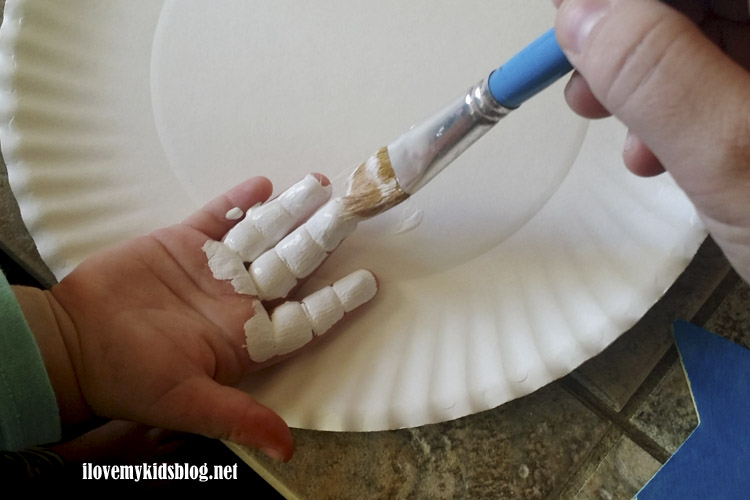 Apply a thick coat of white paint to the pointer, middle, and ring fingers. Depending on the age of the child, this may be a two person job. If you are working with a child 3 and under, or a person with special needs, you may need one person to apply the paint, and another to help stabilize the hand.
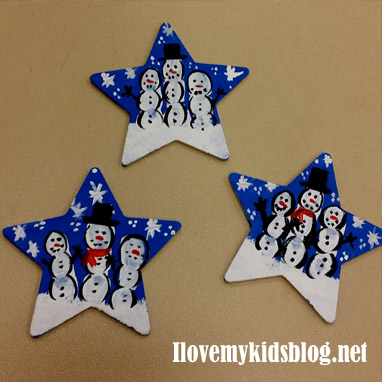
Step Three: Create the Snowman Bodies
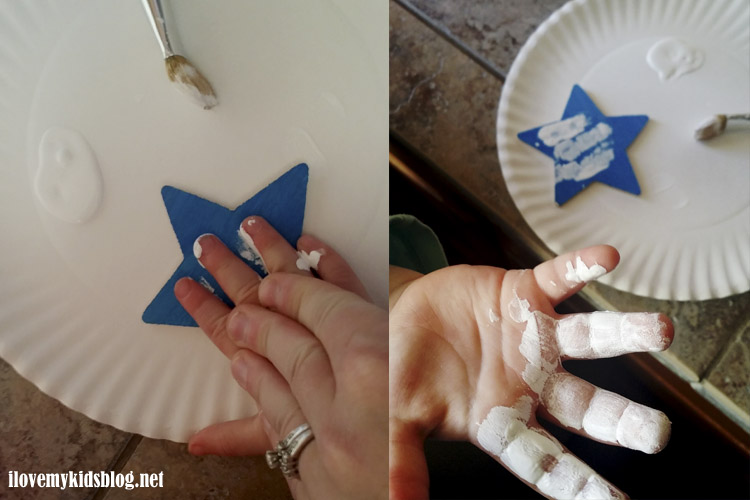 Once the paint has been lathered on the three fingers, evenly press all three fingers down onto the star. Leave the fingers on the star for a good 5 seconds, firmly pressing on each finger carefully to get the most paint transferred to the wooden star as possible. This may be easier said then done, but don’t stress. If the fingers smudge, it is easy to cover it up. Worse case scenario is trying it again, perhaps with just one finger at a time.
Step Four: Add Snow on the Ground
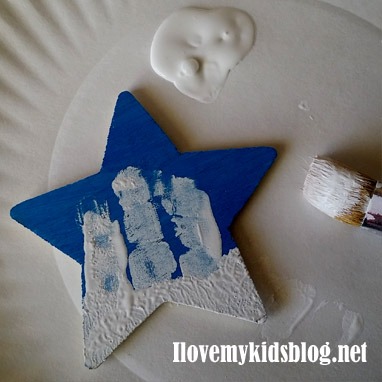 Now that the three snowmen have been created, use some of the remaining white paint to create a snow covered ground. Do this by dabbing the paint brush along the bottom of the star, where the base of the fingers rested.
Step Five: Scatter Snowflakes To and Fro in the Background
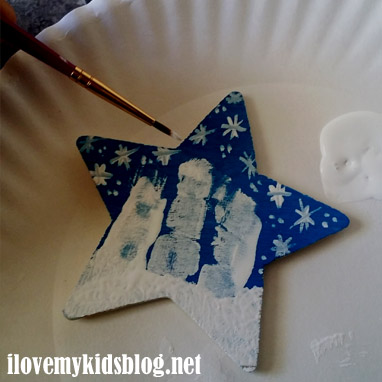 Before the white paint gets put away, switch to a thinner paint brush and decorate the background with snowflakes. If you don’t have an additional paintbrush, don’t worry. Just use the back tip of the paintbrush you were using and create snow flurries instead. Once you have reached this step, give the snowman finger art about 3 to 5 minutes to dry. If you are producing these in bulk, then a hair dryer works great to speed up the drying process.
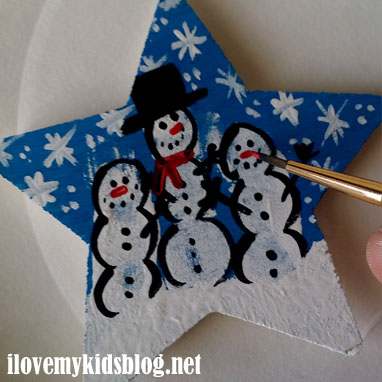
Step Six: Detail the Snowman
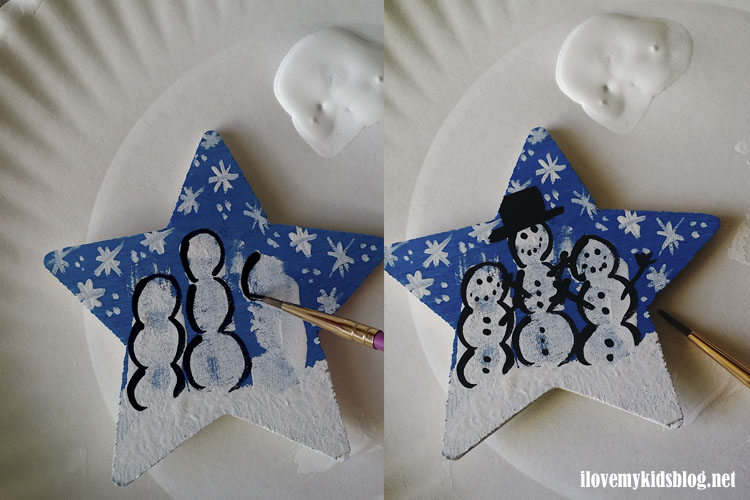 This is the step where the snowman finger art really comes alive! Using a thin paint brush, or black sharpie, carefully outline the body of each snowman, following the curves of the individual fingers. Add two eyes, a mouth, buttons, and stick arms. Rinse the brush, then using a little red paint, or red sharpie, draw a small nose and add a scarf or two. Let dry 3 to 5 minutes.
 Step Seven: Make it Stick (Optional)
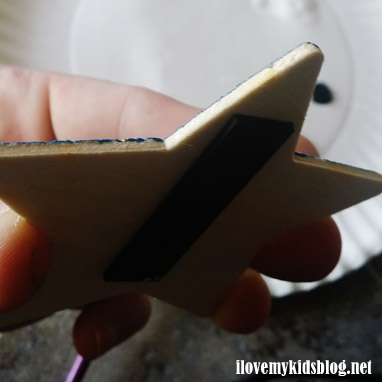 Using the self adhesive magnet strip, cut the size you want and apply it to the star. Follow the instructions on the package of the magnet strip to ensure proper installation. This step can actually be done as the first or last step in the snowman finger art keepsake design. Once applied, your keepsake is complete and can be put on display for everyone to see!
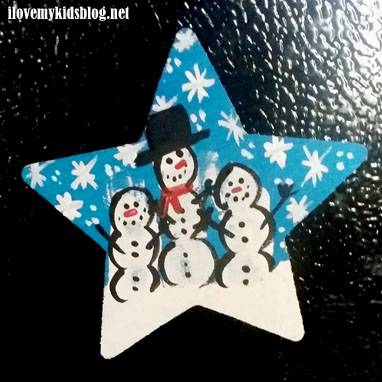 Fun, simple, and memorable for years to come! The snowman finger art keepsake is a great idea for any one on your holiday shopping list! I would love to see your designs using this tutorial! Tag me on Instagram @reviewsbylila and share your creations with me! Enjoy!


1