I LOVE fall! The leaves falling, the cooler weather, and CARAMEL Apples! YUM!
Today I want to share with you how easy it is to make these tasty caramel apples from scratch! You may have all the ingredient already at home! I did! To make these easy gourmet apples you need the following ingredients:
*Apples (one batch of caramel will do about 15-20 apples)
* Sticks
* Butter spray/wax paper
*Cupcake liners
* Melting chocolate/bag of chocolate chips
*Toppings of your choice: pretzels, Oreos/cookies, sprinkles, cinnamon sugar, graham crackers, (anything you think would be tasty!)
* Candy thermometer, pot, cookie sheet, and spatula/wooden spoon
*2 Cups brown sugar
*1 Cup corn syrup
*1/2 Cup (one cube butter)
*1 Can Sweetened Condensed Milk
* 1 Tablespoon vanilla extract
Let’s get making these awesome gourmet caramel apples!
Step 1: Wash your apples, dry your apples and stick them with the sticks. Set them aside.
Step 2: Spray your cookie sheet with butter spray/baking spray and place in the fridge to cool the cookie sheet. (If you don’t have spray you can use wax paper, but the caramel will stick a bit, so I prefer the spraying of the cookie sheet)
Step 3: Begin making your caramel by combining 2 cups of brown sugar, 1 cup corn syrup, and 1/2 cup (1 cube) of butter. Put this over LOW heat OR Medium Low heat (do not go over 3 if you have numbers-or to medium (it will BURN!). Making the caramel will honestly take about 30 minutes and you have to stir constantly, so grab a chair and something to read while you sit there and stir. 🙂 It will be worth it! Here is a picture of those items combined after they melt together:
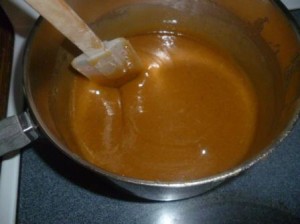
TIP: Stir the entire time!
Step 4: Once those 3 ingredients are melted add the can of sweetened condensed milk to the pot
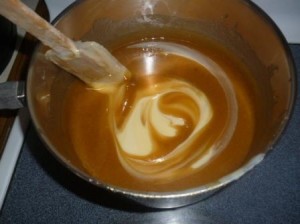
TIP: Do not go over 3 or half way between medium and low on your stove or your caramel will burn!
Step 5: Clip your candy thermometer on the side of your pan and stir. You are going to cook this caramel to 235-240 degrees F. If you can cook it to 238 your caramel will be perfect! 😉 Don’t worry it will still be good at 235 and 240!
LEARN from my mistake-the first time I made these I got up to 238 degrees F in less than a couple of minutes, my caramel was VERY thin still and when I put it on my apples it was thin and slid right off. I couldn’t figure out what I did wrong since it was at 238. The 2nd time I made them, it happened again really fast. It was THEN I realized that my Thermometer was touching the BOTTOM of my pot and the bottom of my pot was at 238 degrees…I lifted my thermometer up slightly so it was in the caramel but not touching the pot and the temp dropped down to 150 degrees! PAY Special attention to make sure that the thermometer isn’t taking the temp of the bottom of pot! When the thermometer got to 235 I would lift it up and check the temp of the caramel. It would always go down. I had to do it frequently and finally when I lifted it the last time, it didn’t go back down, I knew it was finally ready and the right consistency!
Here is a picture of when I THOUGHT my caramel was done and it was actually only at 150 degrees!
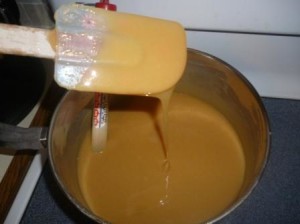
My caramel was thin and then I realized my thermometer was reading the Bottom of the pan and not the temp of the caramel itself! Make sure the caramel is 235-240 degrees!
Here is a picture of the 1st batch of apples I made where the caramel slid right off.

See how the caramel slid off? Read the paragraph above this post to find out how to avoid that problem!
They were still really yummy, but I wanted to do a better job and have the caramel stay on!
Step 6: Once the caramel (not the pot) reaches 235-240 degrees F remove it from the heat and add the 1 Tablespoon of vanilla to it. This will cause it to bubble up and will produce some steam so take caution and be prepared to stir in that vanilla quickly! Here is a picture of caramel that is 238 degrees and ready to be used!
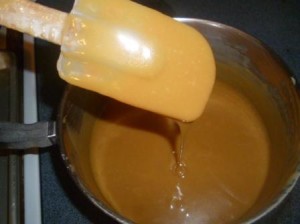
See the darker color compared to the “not done” one I posted up there earlier?
Step 7: Wait 5 minutes. This will help the caramel cool a little bit so it will be the perfect temp to apply and STICK on the apples. While you are waiting, retrieve your cold cookie sheet from the fridge and pat yourself on the back because you just made homemade caramel. 😉
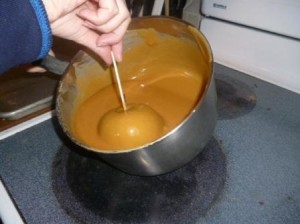
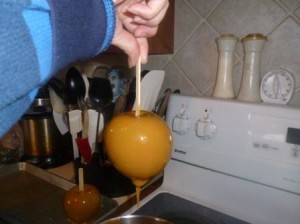
Step 8: Did you wait 5 minutes…I couldn’t I only waited 4, close enough right? Some places leave the top of the apple showing so you can see what kind it is, but I don’t, I cover the whole entire thing! You can choose! If you do opt to cover the whole thing: hold the apple by the stick and with the spoon/spatula that you just stirred with-cover the top part of the apple by the stick. Then tilt the pan towards you and “roll” the rest of the apple in the caramel.
Step 9: Let it drip off for a little bit, then scrape the bottom of it on the side of the pot and place on your cooled & sprayed cookie sheet.
Step 10: Repeat dipping the apples! This part goes pretty fast!
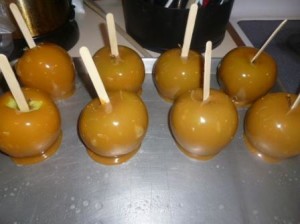
You can see on the bottom left I left one with the green part showing on the top bear the stick just so I could show you what I meant. 🙂
Step 11: Put them back in the fridge for about 20-30 minutes or until they are “cooled”
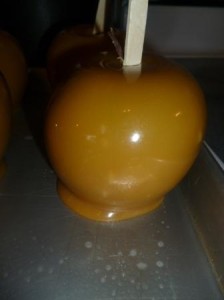
PRETTY!
You can stop at this point and it is still a SUPER treat! I recommend storing them in the fridge. We had some that were still really good and fresh even after 6 days in the fridge! You will get a little “pooling” of caramel on the bottom of the apple, unless you are super patient person and let it drip for a long time….I am not that patient, so I just “roll” the pooled caramel to the bottom of the apple when I am going to decorate.
Step 12: Decorate! You can do this however you’d like. I had some chocolate almond bark on hand and some pretzels. I love chocolate covered pretzels so I thought it would be a tasty combination on a caramel apple! (IT WAS!) (Learn from my mistake–DO NOT use the crumbs at the bottom of the pretzel bag just because they are already crumbs…it is mostly salt and isn’t good—crush up the big pretzels!) Melt your chocolate and put it in a ziplock bag.
TIP: To put melted chocolate in a zippered bag put the bag in a cup and fill it like this, so you own’t make a mess of the zipper part!
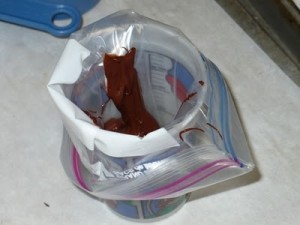
I didn’t take a picture of this part, but I wanted to show you an example, photo credit goes to http://www.thetallgirlcooks.com/2010_12_01_archive.html
Then you zip it up, snip a SMALL snip at the bottom corner of the bag an drizzle it over your apples. Then roll in or sprinkle with cookies, small candies, crushed pretzels, cinnamon sugar, sprinkles, anything you’d like! Once they are decorated, place them on a flattened cupcake liner!
My kids loved the sprinkle ones!
These have been a huge hit for my family! I have made them every week for the last 4 weeks! Apples are such a great price right now and usually to buy a gourmet apple like this it is $7+ each! Wow! I found this awesome caramel recipe that is above on Your Home Based Mom’s website and have been in love ever since!
If you have questions about this process please email me! You are welcome to leave a comment and I will answer, but it won’t let you know that I have replied! cjclaytons at gmail dot com!
I want to see your caramel apples that you make! Post a picture on our Facebook Fan Page!
- A VIVO Mask Will Complete Your Costume! - 10/18/2019
- 10 easy tips to make beautiful pies! - 07/09/2019
- 10 Boredom Busters for Summer Break! - 05/28/2019






1