
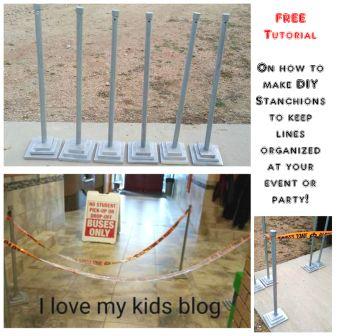
DIY Stanchions-an easy fantastic way to keep lines organized at your party or your event? Are you wondering, what on earth are stanchions? I serve on the PTO at my kid’s school and this year I took charge of the Halloween carnival. I spoke with the teacher that ran the “ticket exchange store” last year and it was total chaos because there were no clear lines. Among other things, she suggested that having some way to clearly designate a line would be so helpful. It took my 9 google search attempts to figure out what to call the “line organizers” that I was trying to figure out how to make. Finally by a stroke of genius I typed in “what are those line things called that help people stay in line at restaurants or movie theaters. That was the ticket….Google came up with the word stanchions! Who knew, right? When I put the words DIY stanchions in the search box it came up with some pretty sad looking stanchions. I looked over 20 sites and they all looked like a ton of work or really terrible. I decided it was time to make a great free tutorial on how to make DIY stanchions that looked awesome.
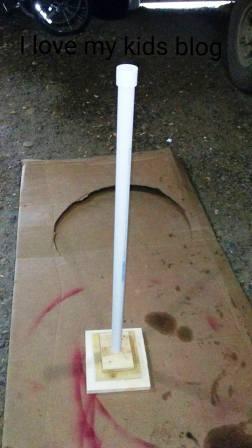
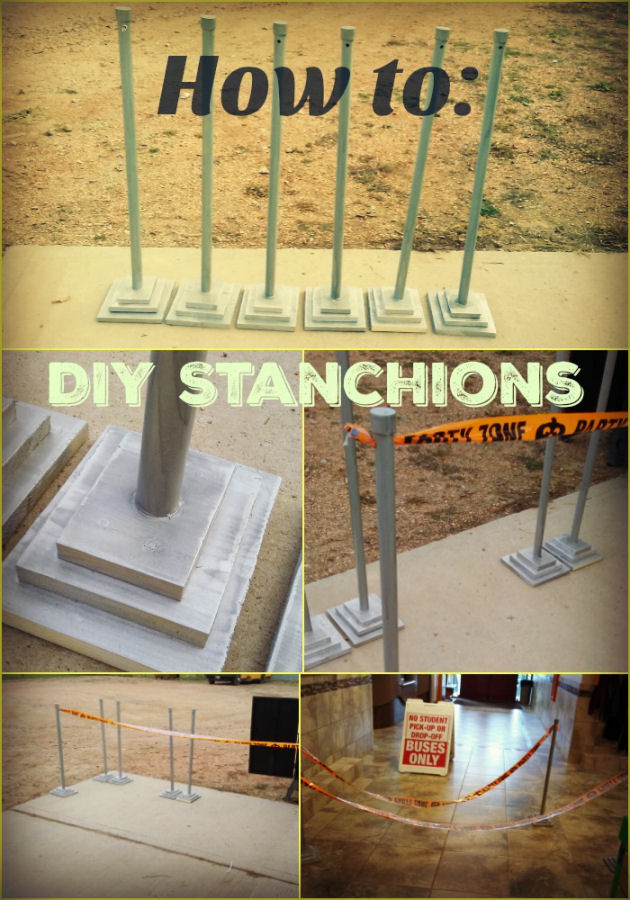
I went to my husband and told him what I wanted to accomplish. Within a few seconds he had come up with a cost effective and easy plan to make them using some scrap wood we had and cheap PVC pipe. He went outside and within 2 minutes he was back in the house with a base already done! Simply using a miter saw he cut 3 small wood rectangles each 1 inch smaller than the previous one. Then he used 2 screws to put them together.  Then using a drill and a hole saw, he removed a 1 inch circle out of the top piece of wood only. We put in a bit of PVC glue that he had and inserted a piece of PVC pipe that was 3 feet tall. It fit perfectly! We topped the PVC pipe with a PVC end cap to make it look more realistic.
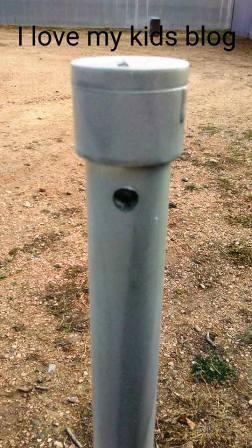
We used a drill bit to make a hole on both sides so a rope or a themed crepe paper or banner could be fed through it. We sanded the wood down and used the spray paint that adheres to plastic. Although if I were doing it again, I would opt to spray it with a primer first then paint it with the more glittery silver, but it still did look pretty good!
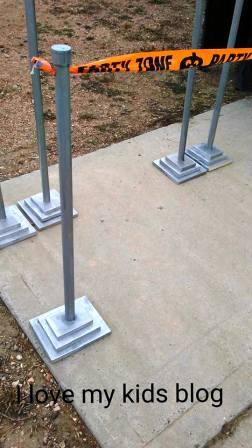
We used them this week for the Halloween party, and had Party Zone banners running through them! It was great to have the lines be marked clearly and it made for a much less chaotic ticket exchange line! I think we will use them at Christmas time when Santa will make an appearance and will need an orderly line for those that want to sit on his lap! 😉 I made a total of 6 stanchions and the cost was less than $20. It would have been less if the spray paint wasn’t so expensive in my little town-it was almost $7 alone! These are super efficient and affordable to make.
 Let me know if you make these DIY stanchions! I’d love to see how you use them at your party or event!

- A VIVO Mask Will Complete Your Costume! - 10/18/2019
- 10 easy tips to make beautiful pies! - 07/09/2019
- 10 Boredom Busters for Summer Break! - 05/28/2019

Thank you so much for this great way to make stanchions! I was looking for a really cheap method for an upcoming fundraiser, and these are PERFECT.
Hi CJ,
What are the dimensions of the base? I love this idea as real ones are so expensive. Did you put something metal in the hole where the “rope” goes.
Thanks for the idea. I teach third grade and needed stanchions for a project at school. I am making these. I have seen pool noodles for the rope, but I need something not so stiff so we can open and let kids through. I’m still thinking about that any ideas?
Amazon sells plastic chains in long lengths pretty cheap- not sure if this will go with your theme or not.
Depending on what you use for the rope, hook and eye closures can be used as well (or just the eyes of you want to use one long piece).
Hope this helps!
These will be great! Need to make 30!! Could you tell me the size and thickness of the 3 wood bases? Thank you!!
Hi. Are your cuts and dimensions listed anywhere?
I dugg some of you post as I cogitated they were extremely helpful extremely helpful
1
1
I feel this is one of the such a lot important information for me. And i’m satisfied reading your article. But should observation on some normal issues, The site style is perfect, the articles is actually nice :