• Home
  • About
    • Disclosure And Privacy Policy
    • PR / Media Kit
    • Privacy Policy
    • Contact
  • DIY & Crafts
  • Lifestyle
    • Parenting
    • Healthy Living
    • Food
    • Fashion
    • Fitness
    • How To
    • Kids
    • Reviews
  • Toys
  • Entertainment
    • Movies
    • Disney

I love My Kids Blog

Parenting tips, Crafts, Product Reviews and More!

  • Home
  • About
    • Disclosure And Privacy Policy
    • PR / Media Kit
    • Privacy Policy
    • Contact
  • DIY & Crafts
  • Lifestyle
    • Parenting
    • Healthy Living
    • Food
    • Fashion
    • Fitness
    • How To
    • Kids
    • Reviews
  • Toys
  • Entertainment
    • Movies
    • Disney

DIY Rain Sticks, So You Can Enjoy the Sound Without the Mess [Activity Sticks Activity]

07/04/2017 By Ashley Leave a Comment

Share

I love the rain and so do my kids. Something I do not love is when my kids get messy in the rain. Of course this is a fun thing I let them do every once in a while, but sometimes I like just listening without having to clean up a mess. This is why we decided to make rain sticks. It was a way for me to enjoy the sound of rain and my kids to still have fun without the mess.
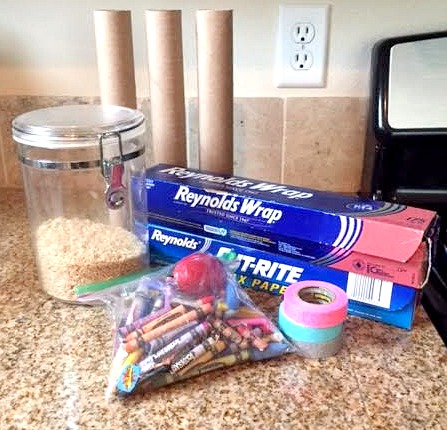
Rain Sticks Supplies

Supplies:

-Empty Paper Towel Rolls

-Tin Foil

-Rice

-Wax Paper

-Strong glue (Stronger than Elmer’s)

-Washi Tape, crayons, or anything you want to use to decorate your rain sticks

Rain Sticks Kids Decorating

Directions:

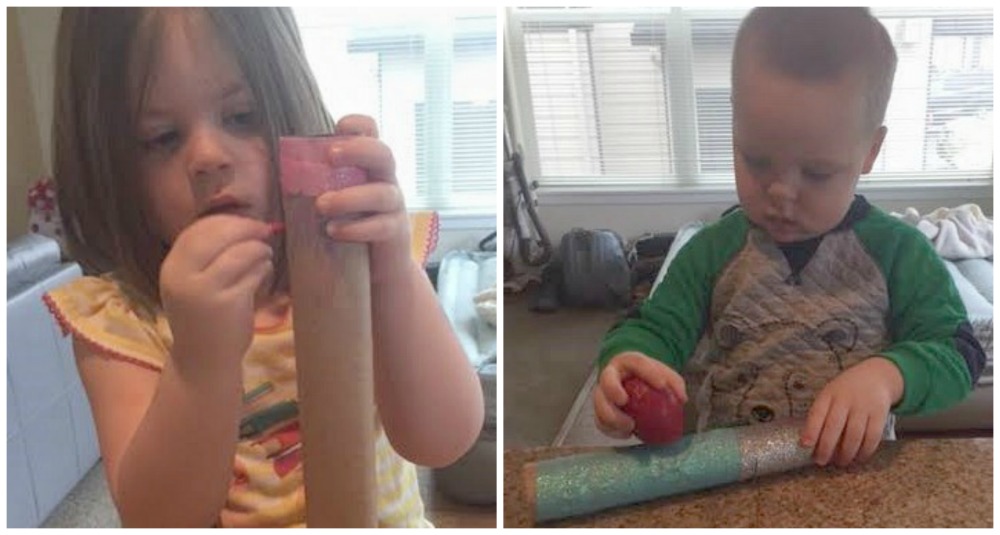
1. The first step is to let your kids decorate their rain sticks.

We wrapped ours with glitter washi tape that I had left over from another activity. They also used crayons to color parts of the tube that they didn’t put tape on. My son even colored on top of the tape with the crayons. There really are so many things you can do to decorate even just with the things you can find around the house.

Rain Sticks Tin Foil

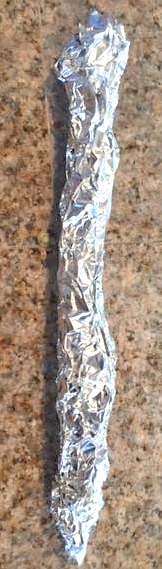
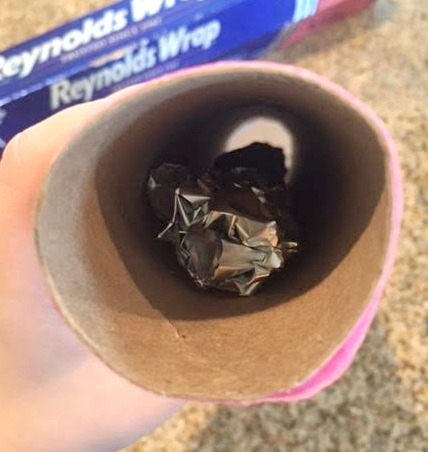
2. Grab some tin foil and bunch together. Make sure this is not bunched too tight, too thick that it won’t be able to fit inside the tube, or too long.

These will be put into the tubes (make enough for the amount of rain sticks you are going to make). I ended up putting two of these inside each rain stick, I thought it sounded better that way.

Rain Sticks Closed
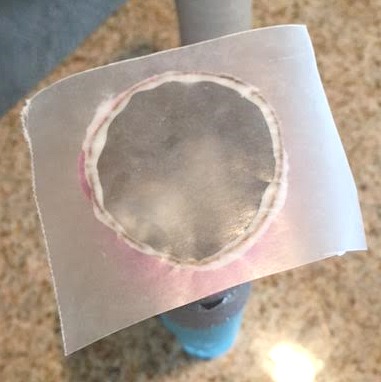
3. Cut out a square of wax paper and glue to one end of the tube (don’t glue to both ends yet).

For this step I used Elmer’s glue but it ended up being a bad decision. The glue did not hold well and they ended up falling apart. I would used rubber cement, super glue or hot glue next time. This way the glue can keep even with the weight of the tin foil and rice.

4. Let the glue dry completely.

Rain Sticks Tin Foil Added

5. After the glue has dried put the tin foil in the tubes along with some rice. I added about 1/2 C-1 full C of rice in each tube. More rice, up to a point, will give you a longer rain sound each time you turn the tube over.

6. Glue a piece of wax paper on the other end of the tube. Let dry and trim edges on each side.

Now they are ready to be played with. The kids will have lots of fun dancing around to the sound of their rain sticks.

If you want some more fun activities to do with your kids check out my activity sticks post that includes over 60 fun activity ideas!

  • Author
  • Recent Posts
Ashley
Ashley
Hey! My name is Ashley and I have been writing for the I Love My Kids Blog for about 3 1/2 years! I love being able to share crafts, kid activities and reviews with you all. I am a mom to three, a 4 year old girl, a 2 year old boy and expecting our third in January of 2018. If you want to be posted on my day to day life and updates of my new blog posts follow me on Instagram @ashleyblegen. The last three years have been so fun, I cannot wait to see what the next three years bring!
Ashley
Latest posts by Ashley (see all)
  • 10 Ways to Practice Self Care During Social Isolation - 04/24/2020
  • Make Brushing Teeth Fun with BriteBrush GameBrush and Baby Shark - 04/21/2020
  • 2019 Gift Guide for Elementary Girls: 10 Fun Ideas! - 12/19/2019

Share this:

  • Click to share on Facebook (Opens in new window)
  • Click to share on Twitter (Opens in new window)
  • Click to share on Pinterest (Opens in new window)

Related

Filed Under: Art, Being Craftsy, DIY & Crafts, DIY Projects with kids, How To, Kids

About Ashley

Hey! My name is Ashley and I have been writing for the I Love My Kids Blog for about 3 1/2 years! I love being able to share crafts, kid activities and reviews with you all. I am a mom to three, a 4 year old girl, a 2 year old boy and expecting our third in January of 2018. If you want to be posted on my day to day life and updates of my new blog posts follow me on Instagram @ashleyblegen. The last three years have been so fun, I cannot wait to see what the next three years bring!

« How to make Pretzel Hugs, the Sweetest Kind of Hugs [Activity Sticks Activity]
A Fun Indoor Rainy Day Activity- Tic Tac Toe Toss [Activity Sticks Activity] »

Leave a Reply Cancel reply

Your email address will not be published. Required fields are marked *

Follow our blog

Follow Us on FacebookFollow Us on TwitterFollow Us on PinterestFollow Us on YouTube
Enter your email for a free daily update:

Our popular posts

Moon Dough play dough! Softest Play Dough EVER! - only 2 ingredients!
Ease Your Baby to Sleep with the HALO Bassinest Swivel Sleeper and HALO SleepSack Swaddle
Learning the ABC's with Pull & Learn Alligator from VTech
DIY Paper Bag Journal Craft Tutorial
How To Make Your Own Sensory Weighted Vest
L is for Lollipop, Lego, Leaf, and Ladybug: Preschool Activities for the Letter L
10 Ways to Practice Self Care During Social Isolation
How to make DIY Stanchions for your event!

Recent Posts

  • 10 Ways to Practice Self Care During Social Isolation
  • Make Brushing Teeth Fun with BriteBrush GameBrush and Baby Shark
  • 2019 Gift Guide for Elementary Girls: 10 Fun Ideas!
  • 2019 Gift Guide for Preschoolers: 5 Fun Ideas!
  • 2019 Holiday Gift Guide for Toddler Gifts: 7 Fun Ideas
  • A VIVO Mask Will Complete Your Costume!
  • How to Make DIY Mason Jar Pen Holders for Your Desk
  • 10 easy tips to make beautiful pies!
  • X is for X food, X-ray, X Marks the Spot and Xylophone: Preschool Activities for the Letter X
  • W is for Worm, Water, Watermelon and Web: Preschool Activities for the Letter W

Copyright © 2025 · Tasteful theme by Restored 316

[footer_backtotop]

Copyright © 2025 I Love My Kids Blog - Site Design by SerightDesigns
About | Privacy | Disclosure | Contact