If you’re tired of bikes be strewn all over the yard, then you should make this super simple wood pallet bike rack! We have 4 kids and with the warmer weather, the kids are riding their bikes every night after school and almost the entire weekend! Last summer we had the kids park their bikes along the fence line by the garden. Anytime the wind would blow, they’d knock over. Every time we mowed we had to move them. Half the time they just dropped them wherever they were at when I hollered out the door it was time to come inside. It wasn’t working.
My husband and I looked into buying a bike rack like the kids’ school has. That was way too pricey. One day I was out feeding the chickens and stepped over a pallet in their coop and thought, I bet a bike tire would fit perfectly in that slot. I grabbed a bike, slid it into place and it fit perfectly! That is when I decided we needed to make our own wood pallet bike rack!
How to make a wood pallet bike rack
Last Saturday, the kids and I went out looking for a pallet. There are about 6 locations in my town that stack them to give away for free. We found one that was in super condition, was clean and could be cut into 2 pieces. The one we found was 2 pallets stuck together. It was perfect!
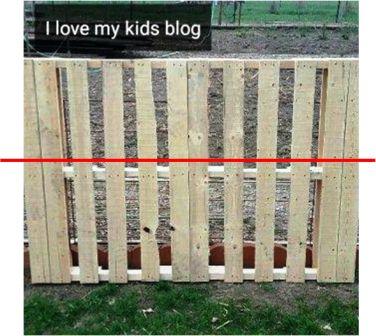
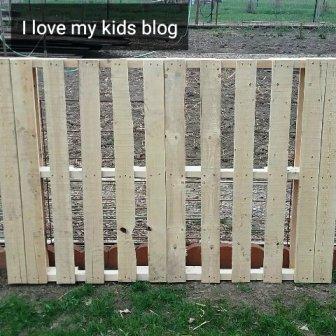 We decided we didn’t want it so tall for two reasons. One, it wasn’t needed and two, it would be more likely to tip over if it was taller. Using the saws-all I turned it on it’s side and made a long cut along the red line pictured below. For stability purposes, it was important that I had that middle piece of wood still intact. That middle wood piece became the top.
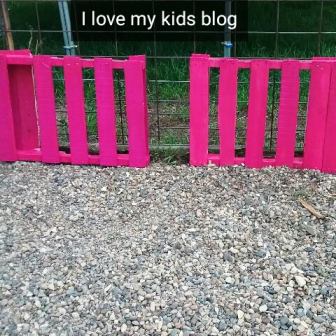
Then I split it straight down the middle. We opted to do this so we could put some space in between the two bike racks, so handle bars wouldn’t hit each other. Then I gave each of the kids a piece of sand paper and instructed them to make sure it was super smooth, especially the parts where the tires would touch. They did a fabulous job! I then double checked it.
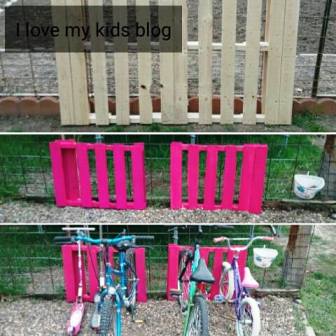
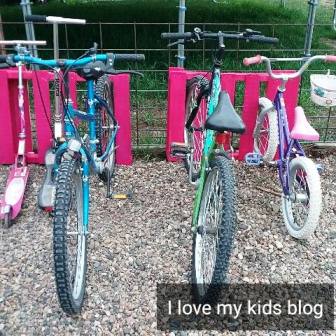
I gave the kids a few options on paint colors just from paint we already had on hand in the furnace room. They opted for the bright pink! I grabbed 5 paint brushes and we got to work painting them. We had lots of laughs painting this together. After it dried completely, I set it up over in a gravel bed we have near the trampoline. This would eliminate any need for us to move them when we mow the lawn. They sure turned out pretty!
The last thing to do was to park the bikes in them. The tired fit perfectly and the bikes stood up with out needing to lean or using the kickstand. We were pretty darn proud of ourselves! 🙂
This project cost me nothing out of pocket. We used a free pallet, sandpaper and paint brushes we already had as well as paint we already had. It took us about 35 minutes plus dry time. The best part, is the kids feel ownership in this bike rack because they helped make it! They park their bikes there every night when its time to come in! I hope you have fun when you make one too! Thanks for reading!
- A VIVO Mask Will Complete Your Costume! - 10/18/2019
- 10 easy tips to make beautiful pies! - 07/09/2019
- 10 Boredom Busters for Summer Break! - 05/28/2019


Thank you very much for sharing this.
1
1