
It is my favorite time of year again! The leaves are changing, the air is chilling (at least every where except for Texas), and the Halloween costume planning has commenced. This time of year always brings back so many memories from my childhood. One of my favorite memories is the many costumes my mom made. Every year my siblings and I wore homemade costumes for trick or treating. So since having kids it has been fun to be able to carry on that tradition and make them their costumes every year.

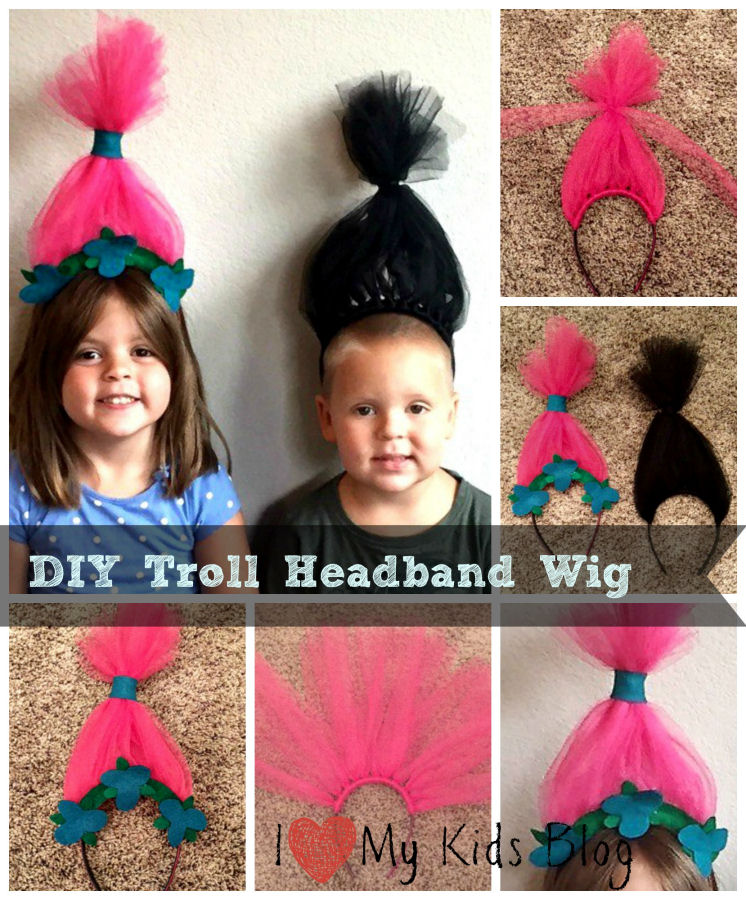
This year (with a little nudging from me) my kids chose to be Poppy and Branch from Trolls. So for their costumes I started with the easiest part, their crazy troll hair. There are a lot of cute ideas for how to do troll hair for a costume but I ended up going with headbands. They were really easy and quick to make and turned out really cute.
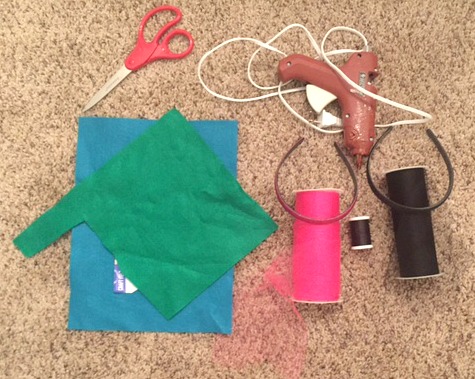 The supplies you will need:
- Pink Tulle
- Black Tulle
- Scissors
- Hot Glue Gun
- Pink Headband
- Black Headband
- Green Felt
- Teal Felt
Step 1:
Cut tulle into 24 inch long pieces. I cut about 5 at a time until I knew how many I would need.
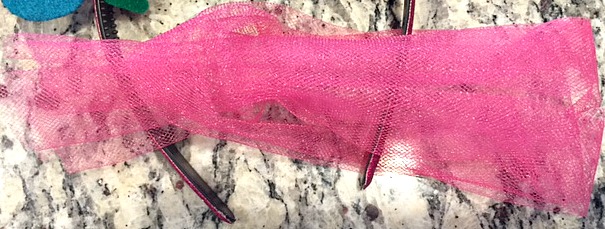
Step 2:
Start tying the tulle around the headband. You do this by folding the tulle in half, holding it behind the headband and pulling the ends of the tulle over the headband and through the bottom of the tulle (where there will be a loop from it being folded in half). Then pull it tight around the headband.
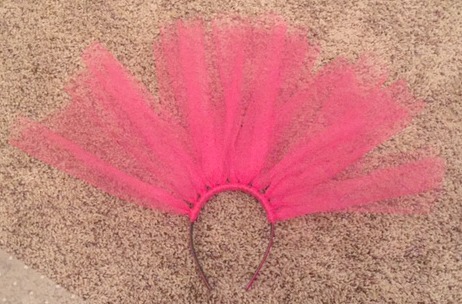
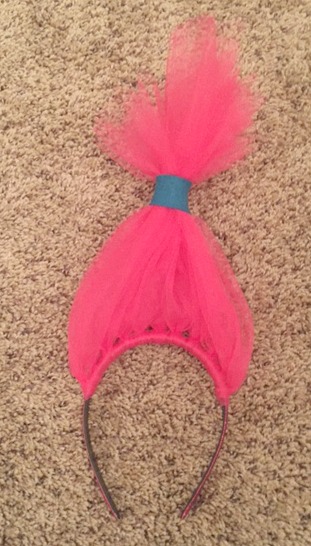
Keep tying tulle from one end to the other end. When you are done it will look like the picture above.
Step 3:
Start at one end of the tulle and slowly gather it in your hand about 2-3 inches from the top of the tulle. Once it is all gathered above the center of the headband tie it together with another piece of tulle (I had originally planned on using thread for this but it was not working, tulle worked much better). I double knotted the tulle to make sure it was secure. Trim the edges of the tulle used to tie them all together.
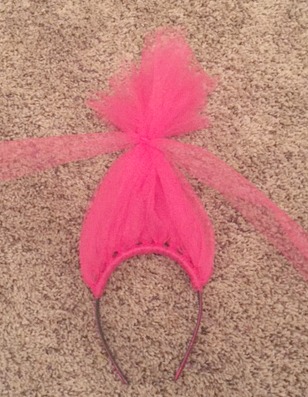
 Step 4:
For this step you will want your hot glue gun ready. Cut out a piece of your teal felt, big enough to cover the tie at the top of the tulle. My piece ended up being too long which was fine because I just trimmed it after I was done gluing. Start by gluing one end of the felt onto the tulle (make sure it is glued on the side of the headband that you want the back to be). Then wrap the felt around the tulle and glue the other side on top of the first side. Trim any excess felt.
Step 5:
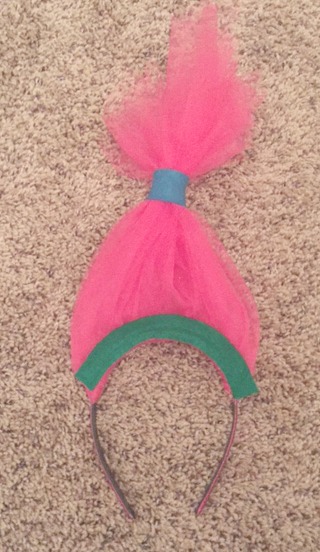
Now it is time to start the Poppy headband. For the green I cut out a piece of the green felt with a width I liked (you can make yours skinnier or thicker depending on your preferences). Using your hot glue gun start gluing the felt onto the bottom of the tulle/top of the headband starting from one end and slowly gluing around to the other end. Trim any excess felt.
 Step 6:
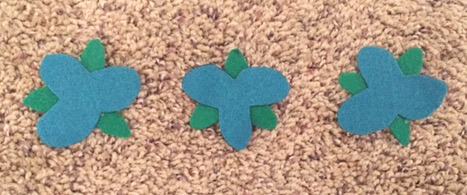
For the headband we need three teal flowers. These I just traced free hand on the felt with a marker and then cut out. You can do this by either looking at the ones I made or look up Poppy from Trolls on Google and you can see exactly how her flowers look (they are pretty close to the ones I ended up with). Then with each flower it has three green leaves. Cut out three leaves for each flower and hot glue them onto the back of the flowers with a little bit of them sticking out so they can be seen from the front.
Step 7:
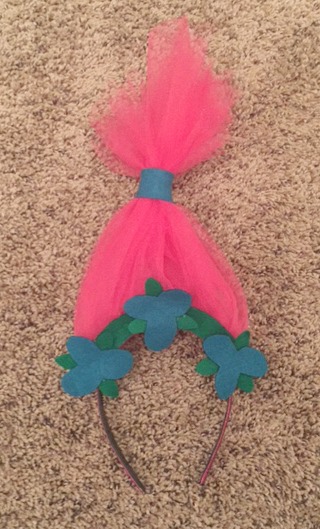
Glue the flowers onto the green felt headband. I did one on each end and the third one in the middle.
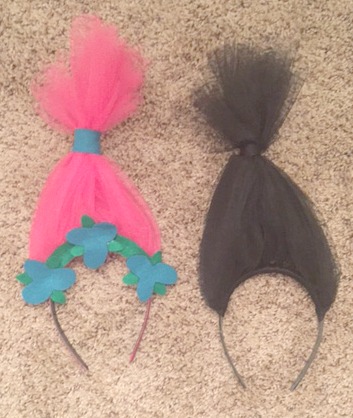 For Branch’s headband just follow steps 1-3 and you will be done.
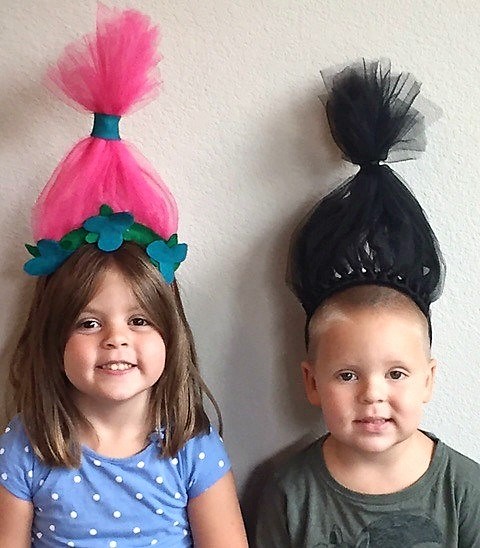
Now they are ready for some Halloween fun!
Ok not quite but they are getting closer. These headbands would also be a fun and easy idea for a Trolls birthday part for all the kids to wear. They only take about 5-10 minutes to make and the most expensive part of it for me was the headbands. Everything else happened to be lying around the house but really aren’t things that are hard to find at any craft store.
Are any of your kids going to be Trolls this Halloween? If not what are they going to be? Let us know in the comments below!


Trzeba mieć wytrwałość i wiarę we własne siły Twój portal jest tego przykładem. Trzeba wierzyć, że człowiek jest do czegoś zdolny i osiągnać to za wszelka cenę!.