
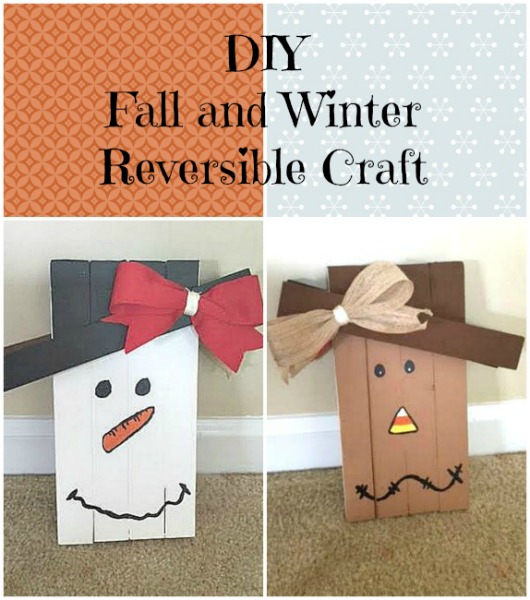
Fall and Winter is my favorite time of the year.
I love snuggling up under a blanket, all the warm clothing I get to wear, making soups and I love the fall and winter crafts. All the fall and winter crafts are super cute and I love celebrating this time of year by displaying all of my crafts around my house, even though I don’t have any yet but I am working on that. One reason I don’t have very many crafts to display this time of year, despite me wanting more, is because it is such a pain to have to unpack and pack up the crafts as the seasons change but that is one thing that is eliminated with this super easy craft I found. This challenge is eliminated because it is a craft for two seasons in one so between the fall and winter season you only have to flip it around instead of having to pack it all up, you won’t have to do that until the Spring because it is a reversible craft.
 Supplies:
- 4 wood boards for the body, the measurements of each of my planks is, 10″ x 1 1/2″ x 3/4″ (I just found some wood in our garage from a room we tore down a couple months ago but you could also buy some wood from home depot or lowes)
- 2 wood boards for the hat rim, the measurements for mine are, 9″ x 1 1/2″ x 3/4″
- Paint brushes, I used the sponge brushes and I also ended up using thinner brushes for the finer details but they aren’t pictured above
- Paint marker, I didn’t end up using this but my friend liked using it for some of the finer detail
- Wood glue
- Tan string
- Brown ribbon
- Red ribbon
- Dark brown paint
- Light brown pain
- Yellow paint
- White paint
- Black paint
- Orange paint
- Hot glue gun
Directions(Scarecrow):
- Glue your 4 boards for the body together with the wood glue.
- Paint the bottom of the board with the light brown paint, up to where you want to put the hat rim.
- Paint the top with the dark brown paint.
- Paint one of the hat rim boards brown on every side.
- Once the brown paints are dry on the body and the hat rim, use the wood glue and glue the hat rim to the body so that it is slanted.
- Use one of your smaller paint brushes and the black paint to paint on eyes. (This can also be done with a paint marker)
- When the black paint is dry add a white dot to each eye.
- Use a small paint brush, or the paint marker, to draw the triangle nose. (You could also do this after you paint the inside of the nose but I found it easier to paint the triangle and fill it in)
- Use the white, orange and yellow paint and a small paint brush to fill in the nose, it should look like a piece of candy corn.
- Use the black paint and paint brush, or paint marker, and paint on a mouth. Add some “stitch” marks for a cute accent.
- Use your brown ribbon and make a bow. Wrap the center of your bow with your tan string.
- Hot glue your ribbon to the hat rim.
Directions(Snowman):
- Turn your craft over so the scarecrow is facing the table and you are looking at the plain side of your craft.
- Paint the bottom of the body white, up to where you will put the hat rim which should be parallel to the scarecrow’s hat rim.
- Paint the top of the snowman and all sides of the plank for the hat rim black.
- Once the white and black paint is dry use the wood glue and glue the hat rim onto the snowman, making sure it is parallel to the scarecrow’s hat rim.
- Use the black paint and a small paint brush, or the paint marker, and paint on the snowman’s eyes.
- Paint on the snowman’s carrot nose with the orange paint and a paint brush.
- When the orange paint is dry use the black paint and a small paint brush or the paint marker to outline the carrot nose and add some detail.
- Paint on a squiggly smile with the black paint and small paint brush or the paint marker.
- Make a bow with the red ribbon and the tan string.
- Attach the bow to the hat rim with the hot glue gun.
Now your reversible craft is done! Easy, quick and super cute.
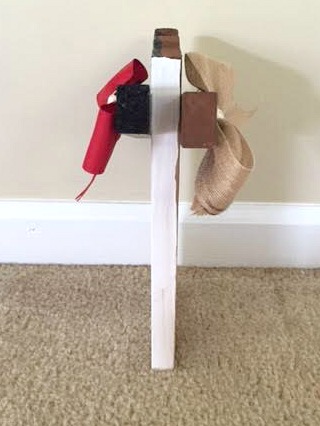 Here is a picture from the side just to give a better visual of how the craft is truly reversible.
Let me know in the comments below if you have ever made a multi seasonal craft.


1
1